WEEK 10
PROTOTYPE 3
Developing interactive tool
This week focused on developing Prototype 3 as a full website tool. I planned the sitemap, built mid-fidelity wireframes, and refined them into high-fidelity screens to define the interaction flow and structure.
Sitemap
Structuring the tool into a clear sequence from input to output.
Mid-fidelity wireframe
Testing layout, interaction flow, and system hierarchy.
High-fidelity wireframe
Refining interface, visual system, and user experience.
[ What this tool is for & who ]
Project positioning
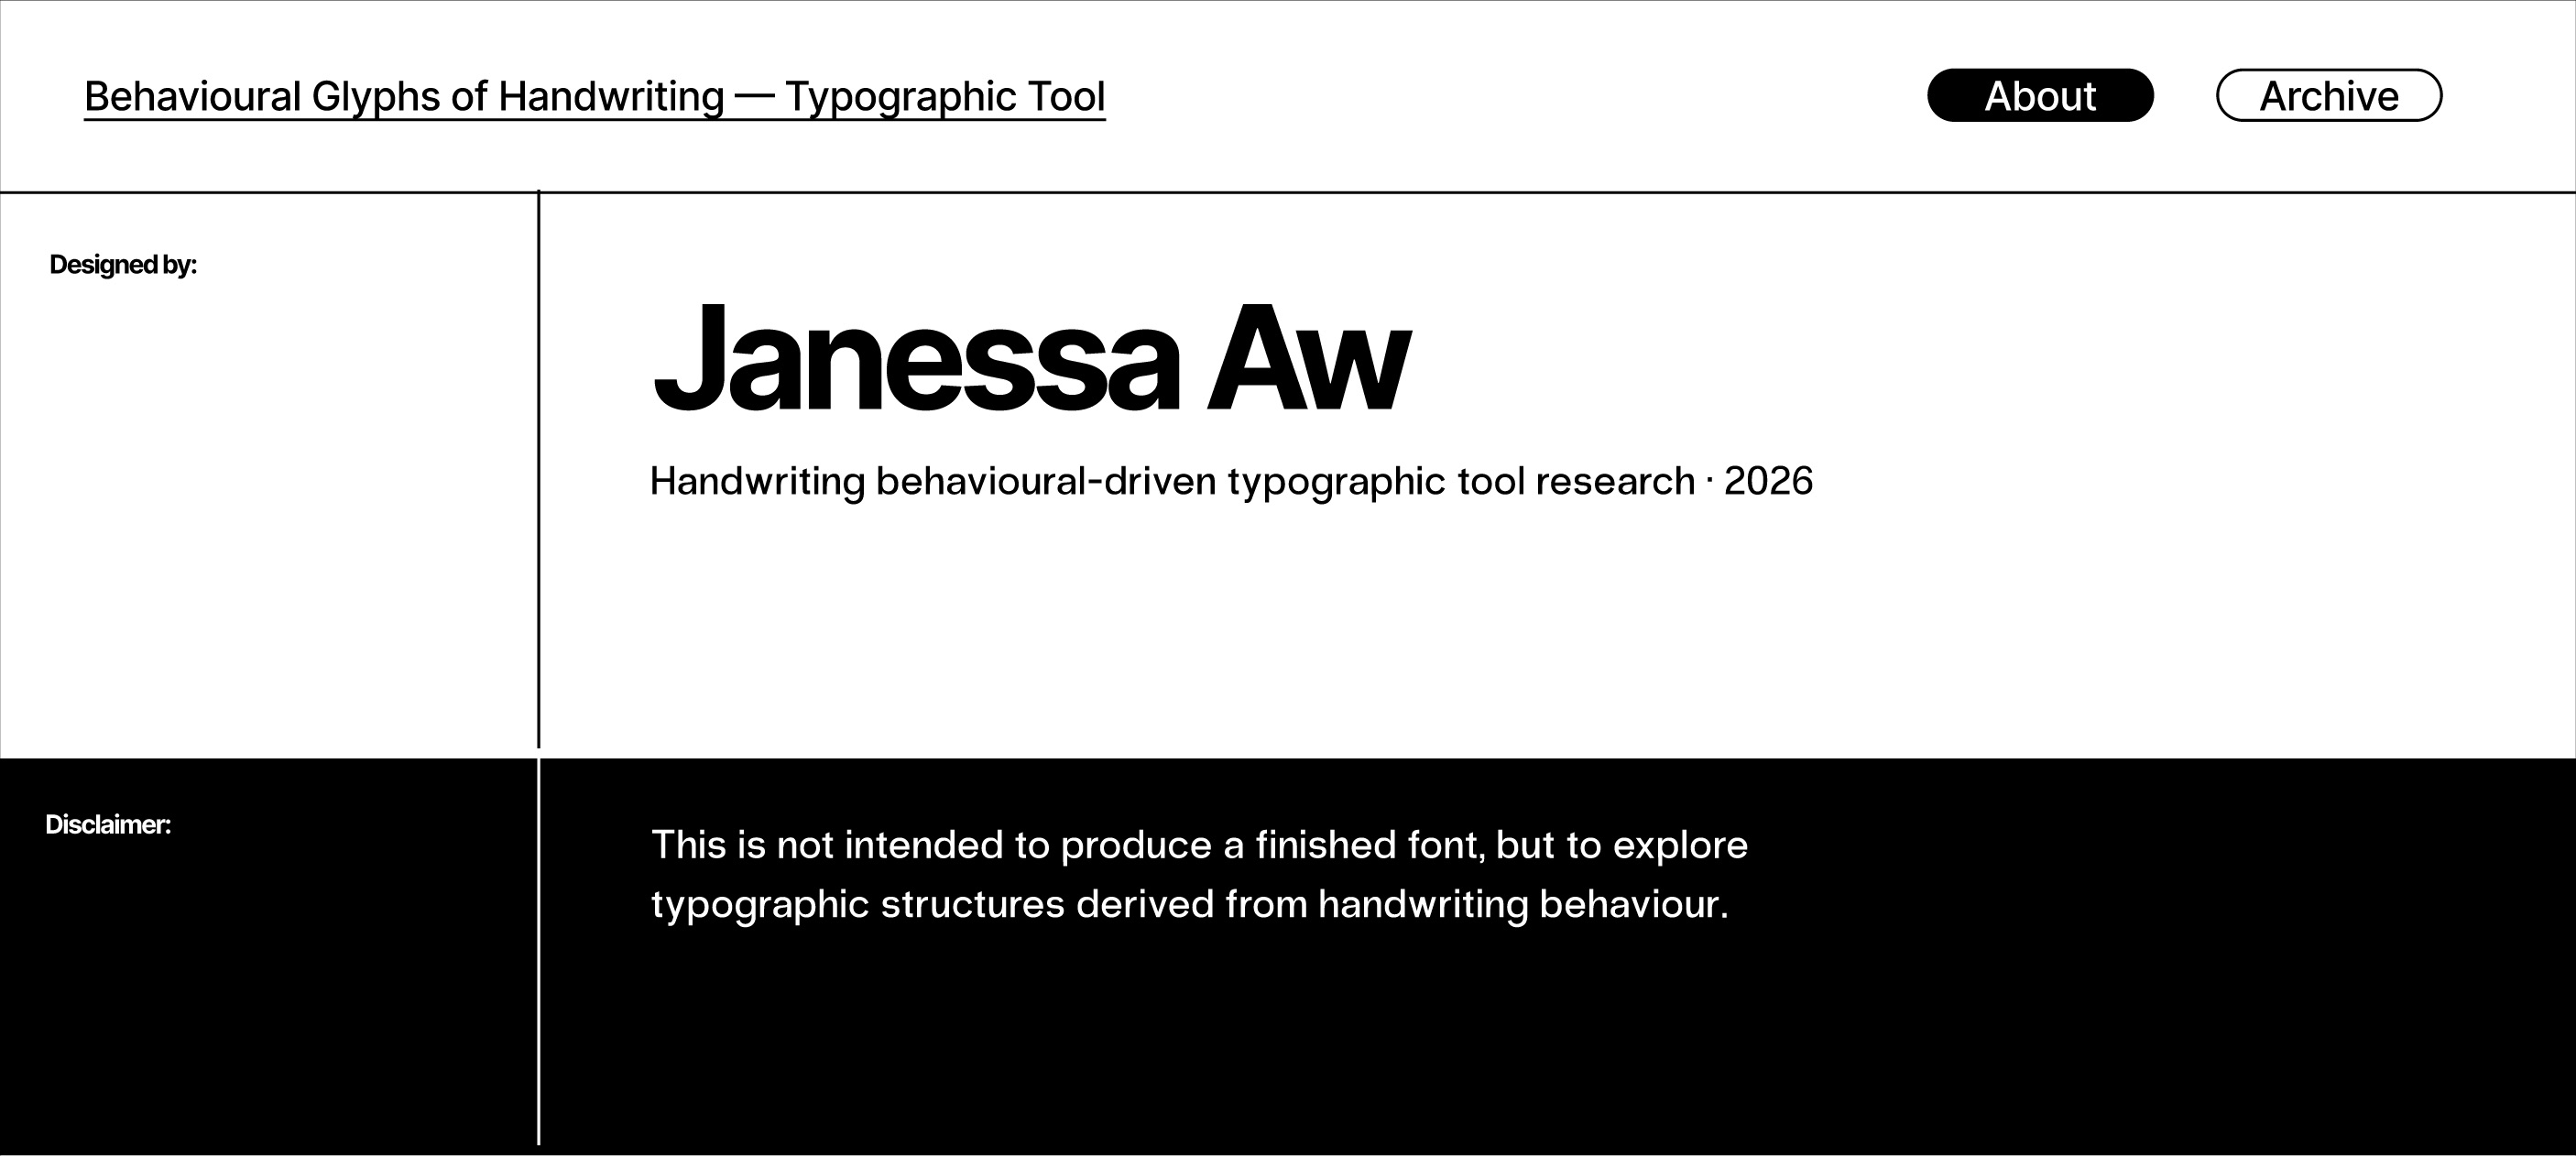
A behavioural typographic tool for designers
My project looks at handwriting as an embodied gesture, focusing on how it is written rather than just the visual trace, and translates this into a personalised typographic system.
This tool is for designers interested in exploring new forms of personal branding and typographic identity. It offers a fresh perspective on individuality because identity here is shaped by how each person writes.
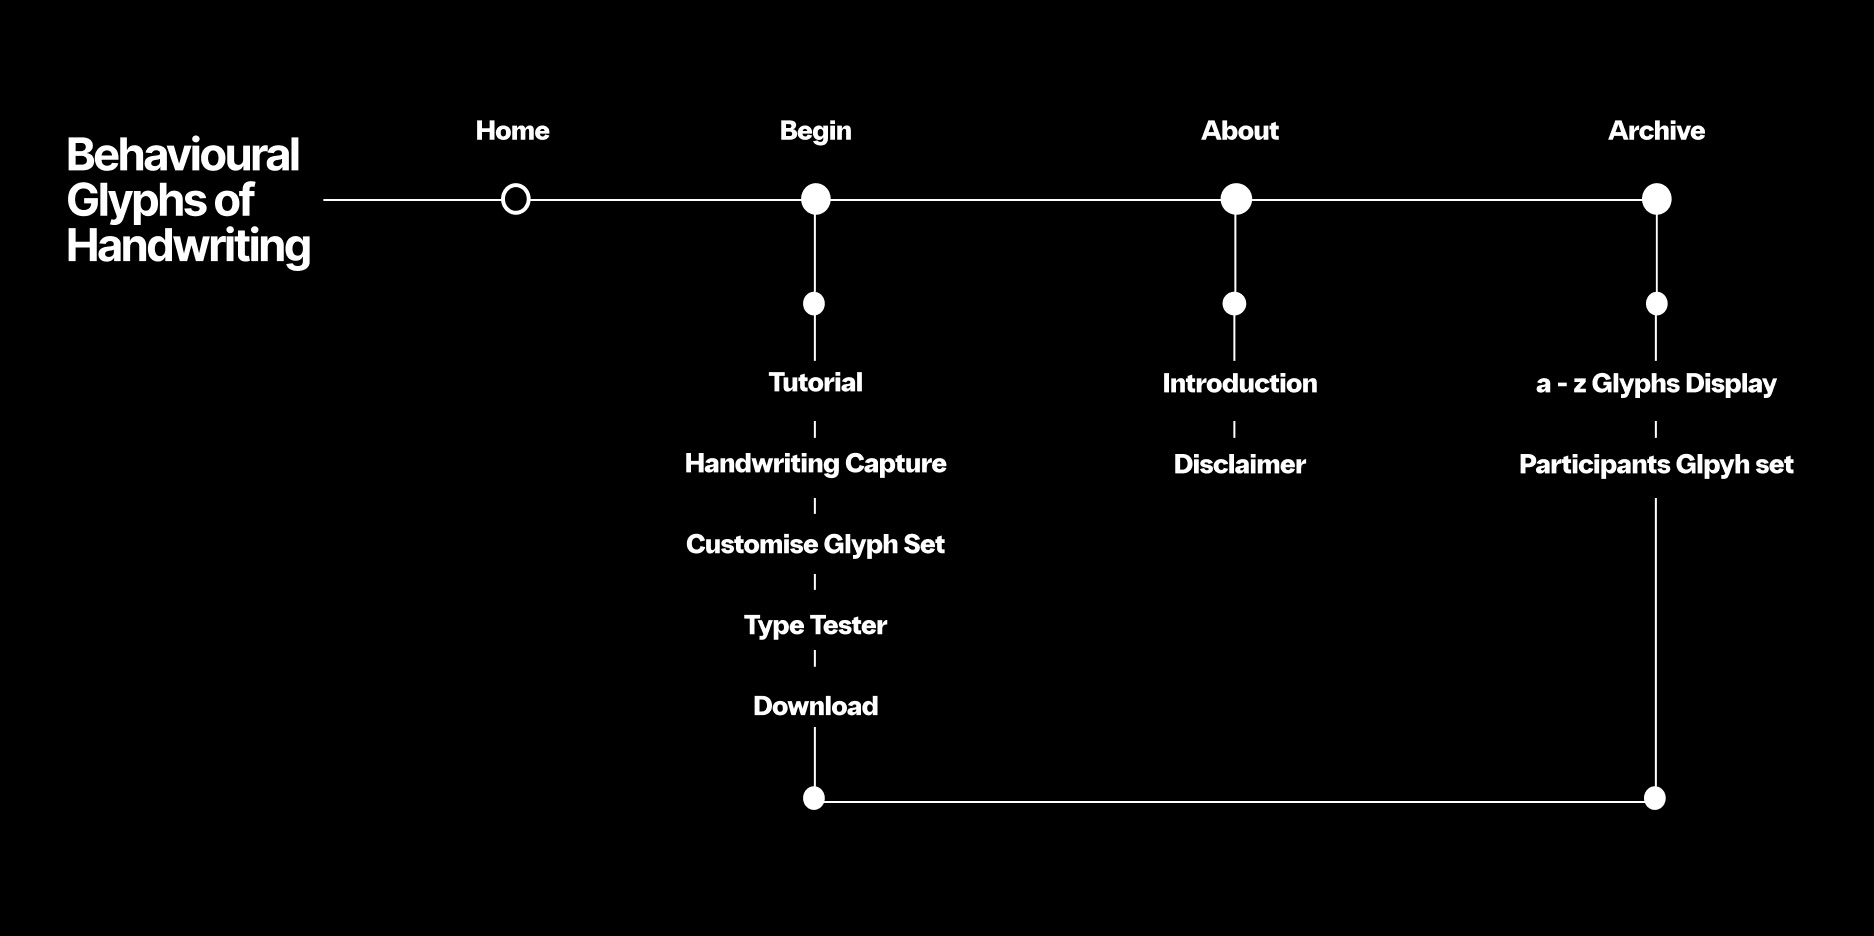
[ Sitemap ]
Flow and structure
A continuous journey through the tool
The sitemap defines the tool as a continuous journey rather than separate pages. It maps the flow from home to tutorial, capture, customise, type tester, and download, with archive and about supporting the system.
[ Mid-fidelity wireframe ]
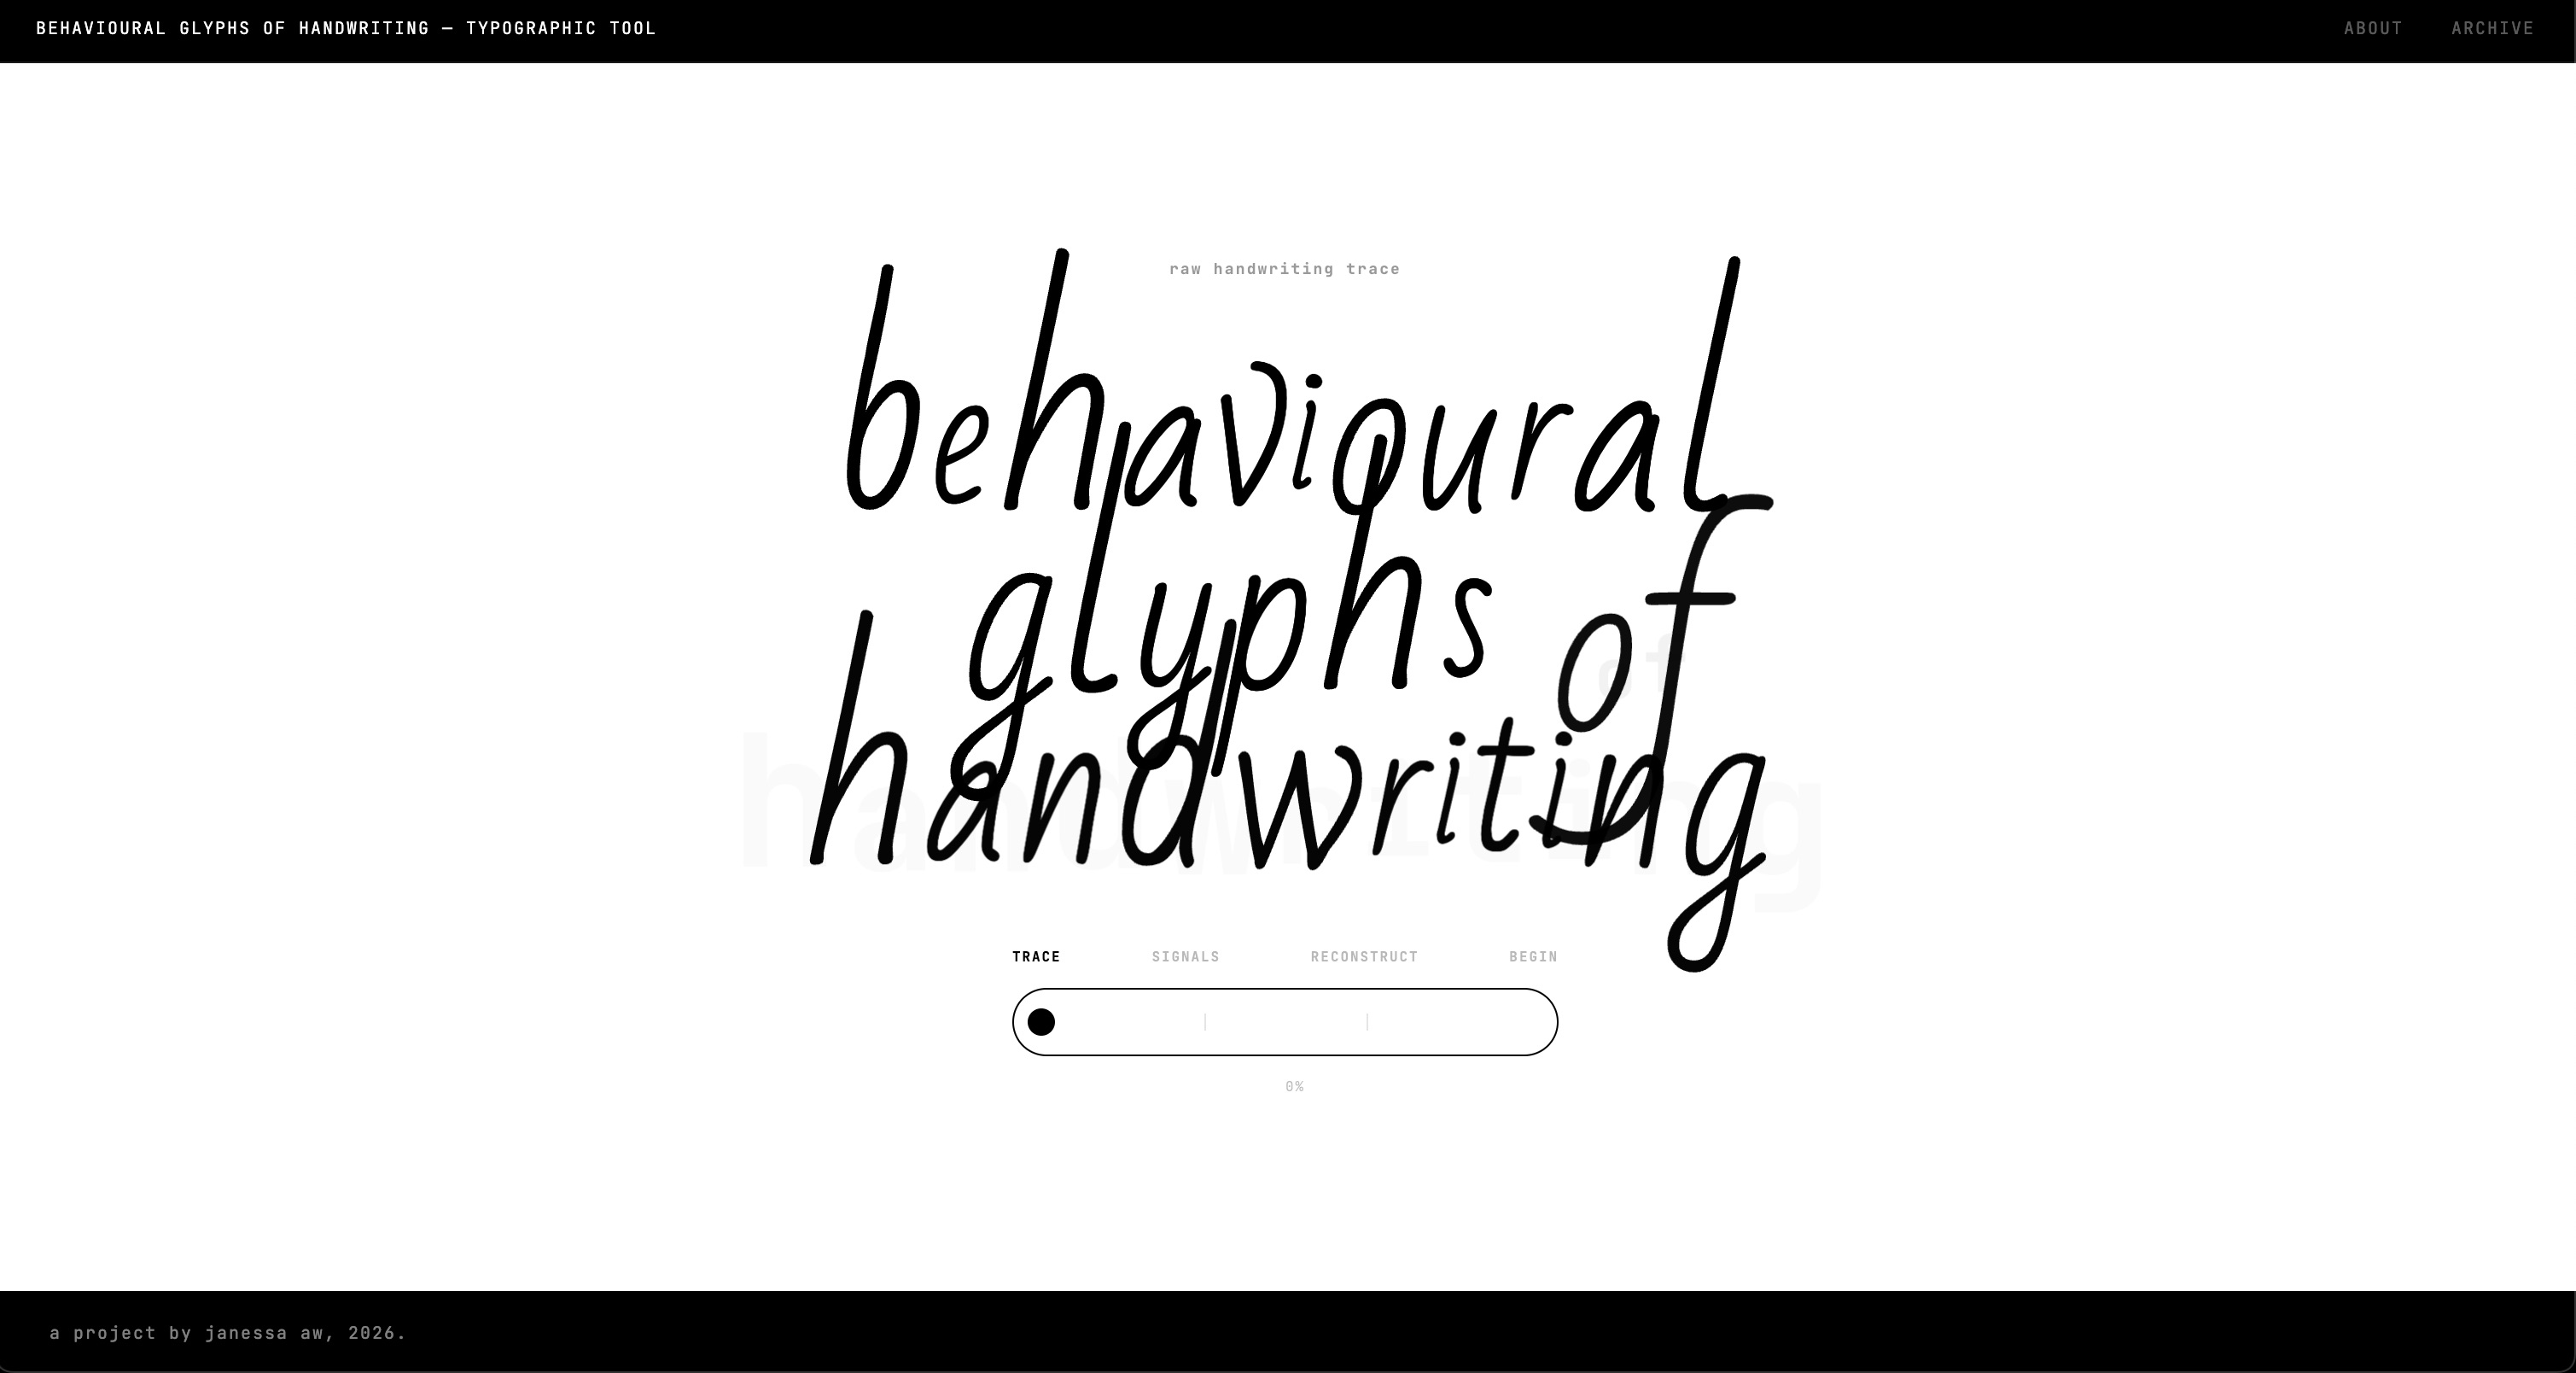
Home
Entry point into the behavioural typographic system

-
Entry point
Introduces the project as a behavioural typographic tool and gives users a clear starting point without overwhelming them with information. -
Guided flow
The sequence begin → tutorial → capture → customise → type tester → download structures the experience and helps users understand what comes next. -
Project positioning
Frames the tool as a system that translates handwriting into glyphs, rather than a simple drawing interface.
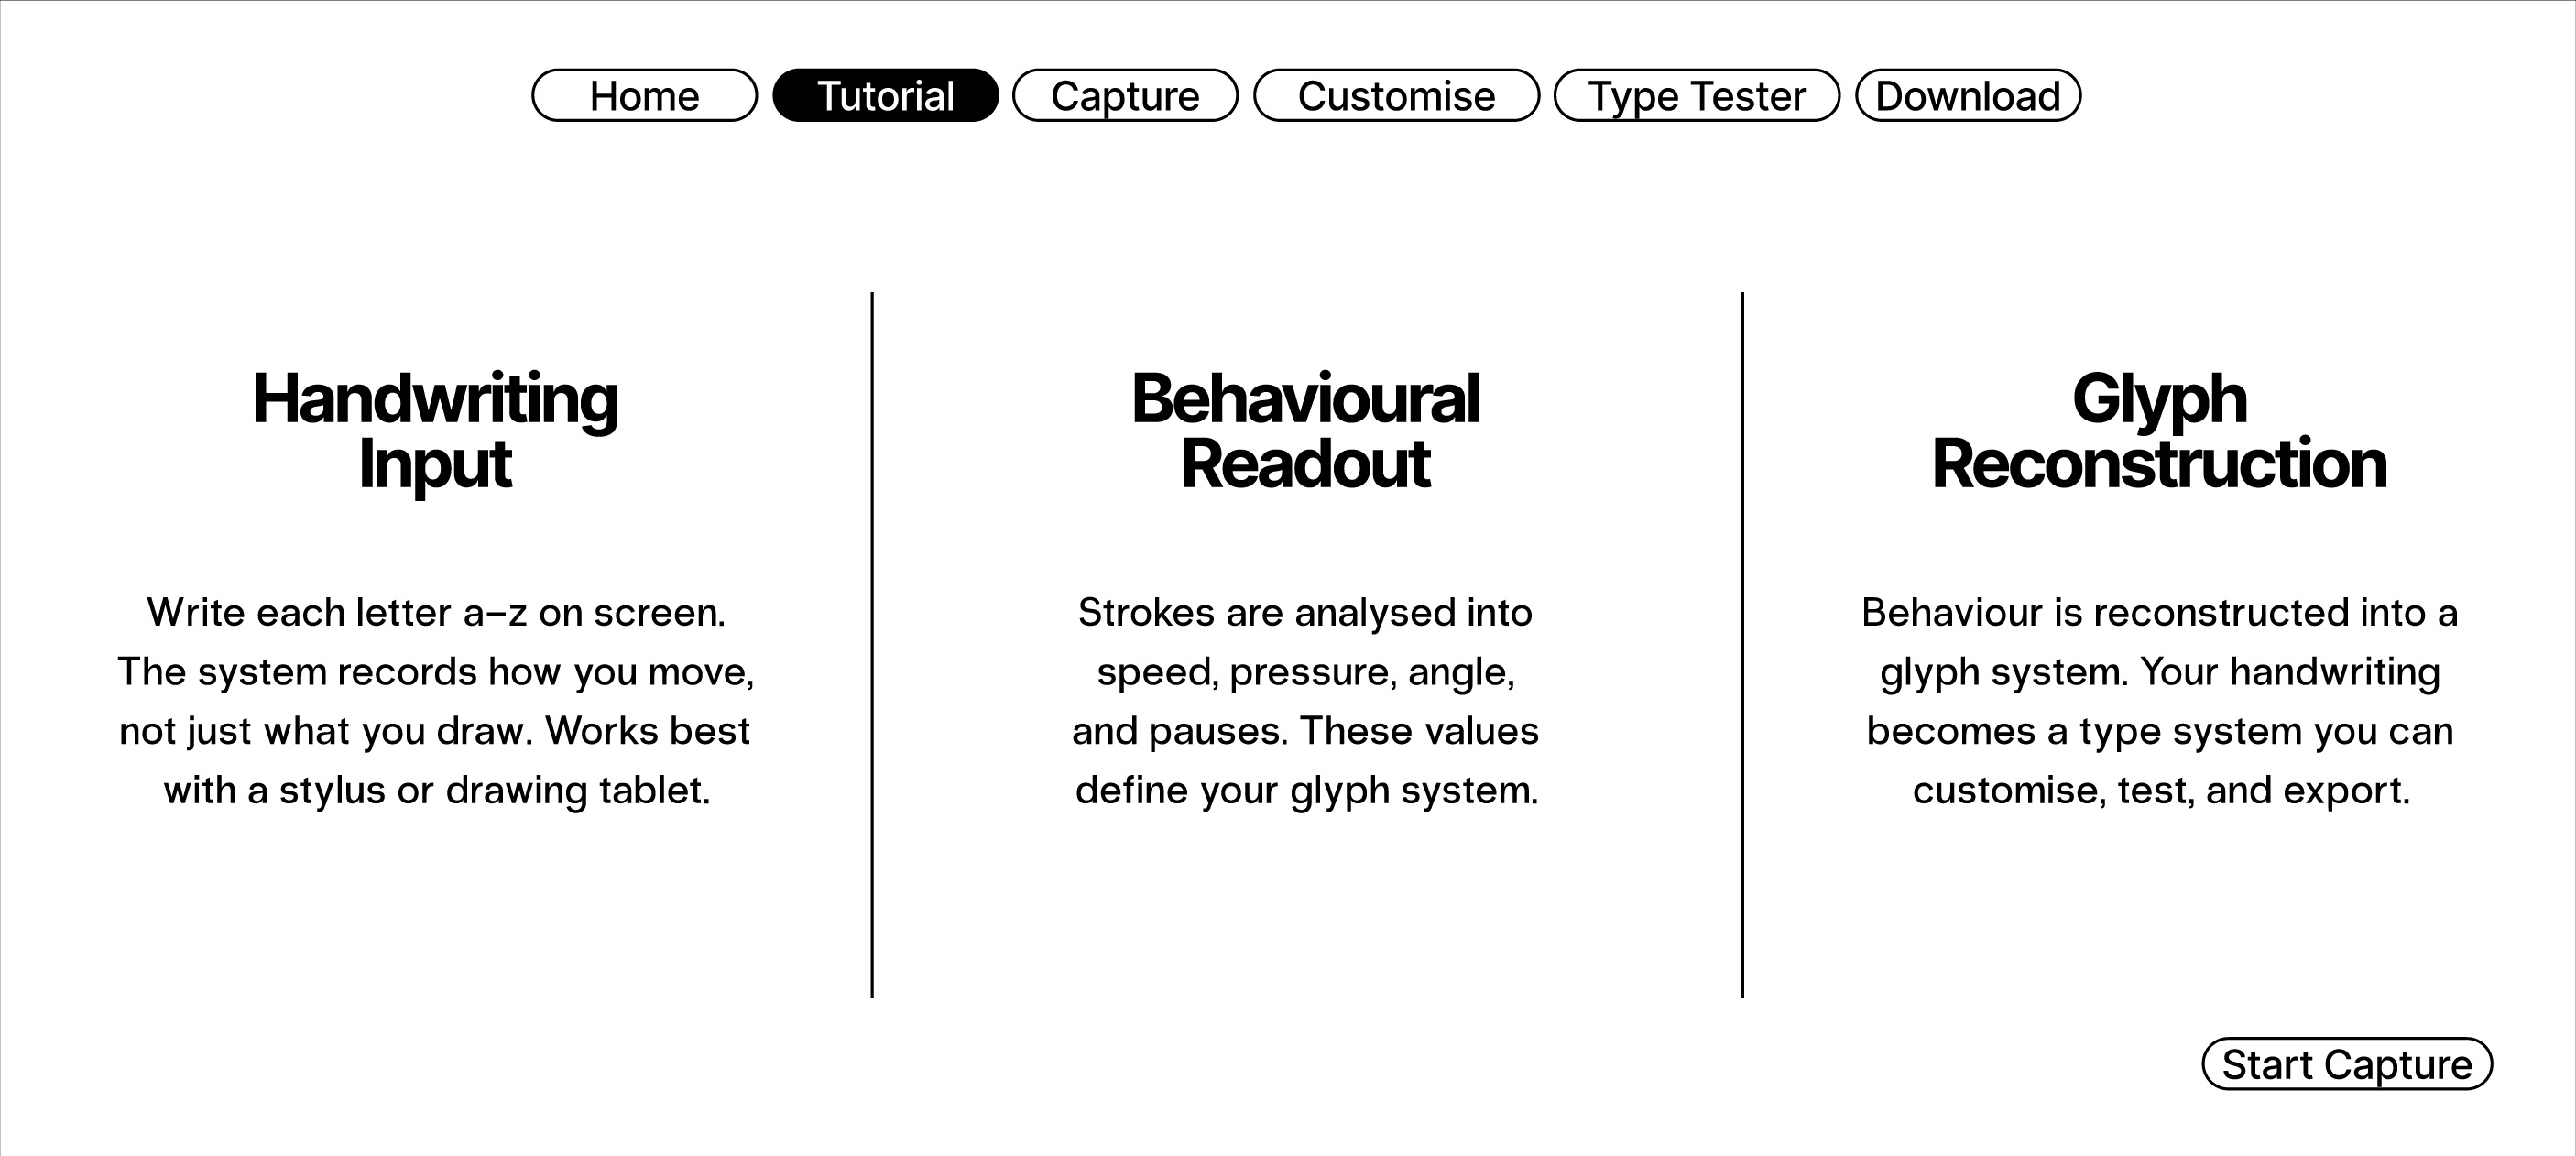
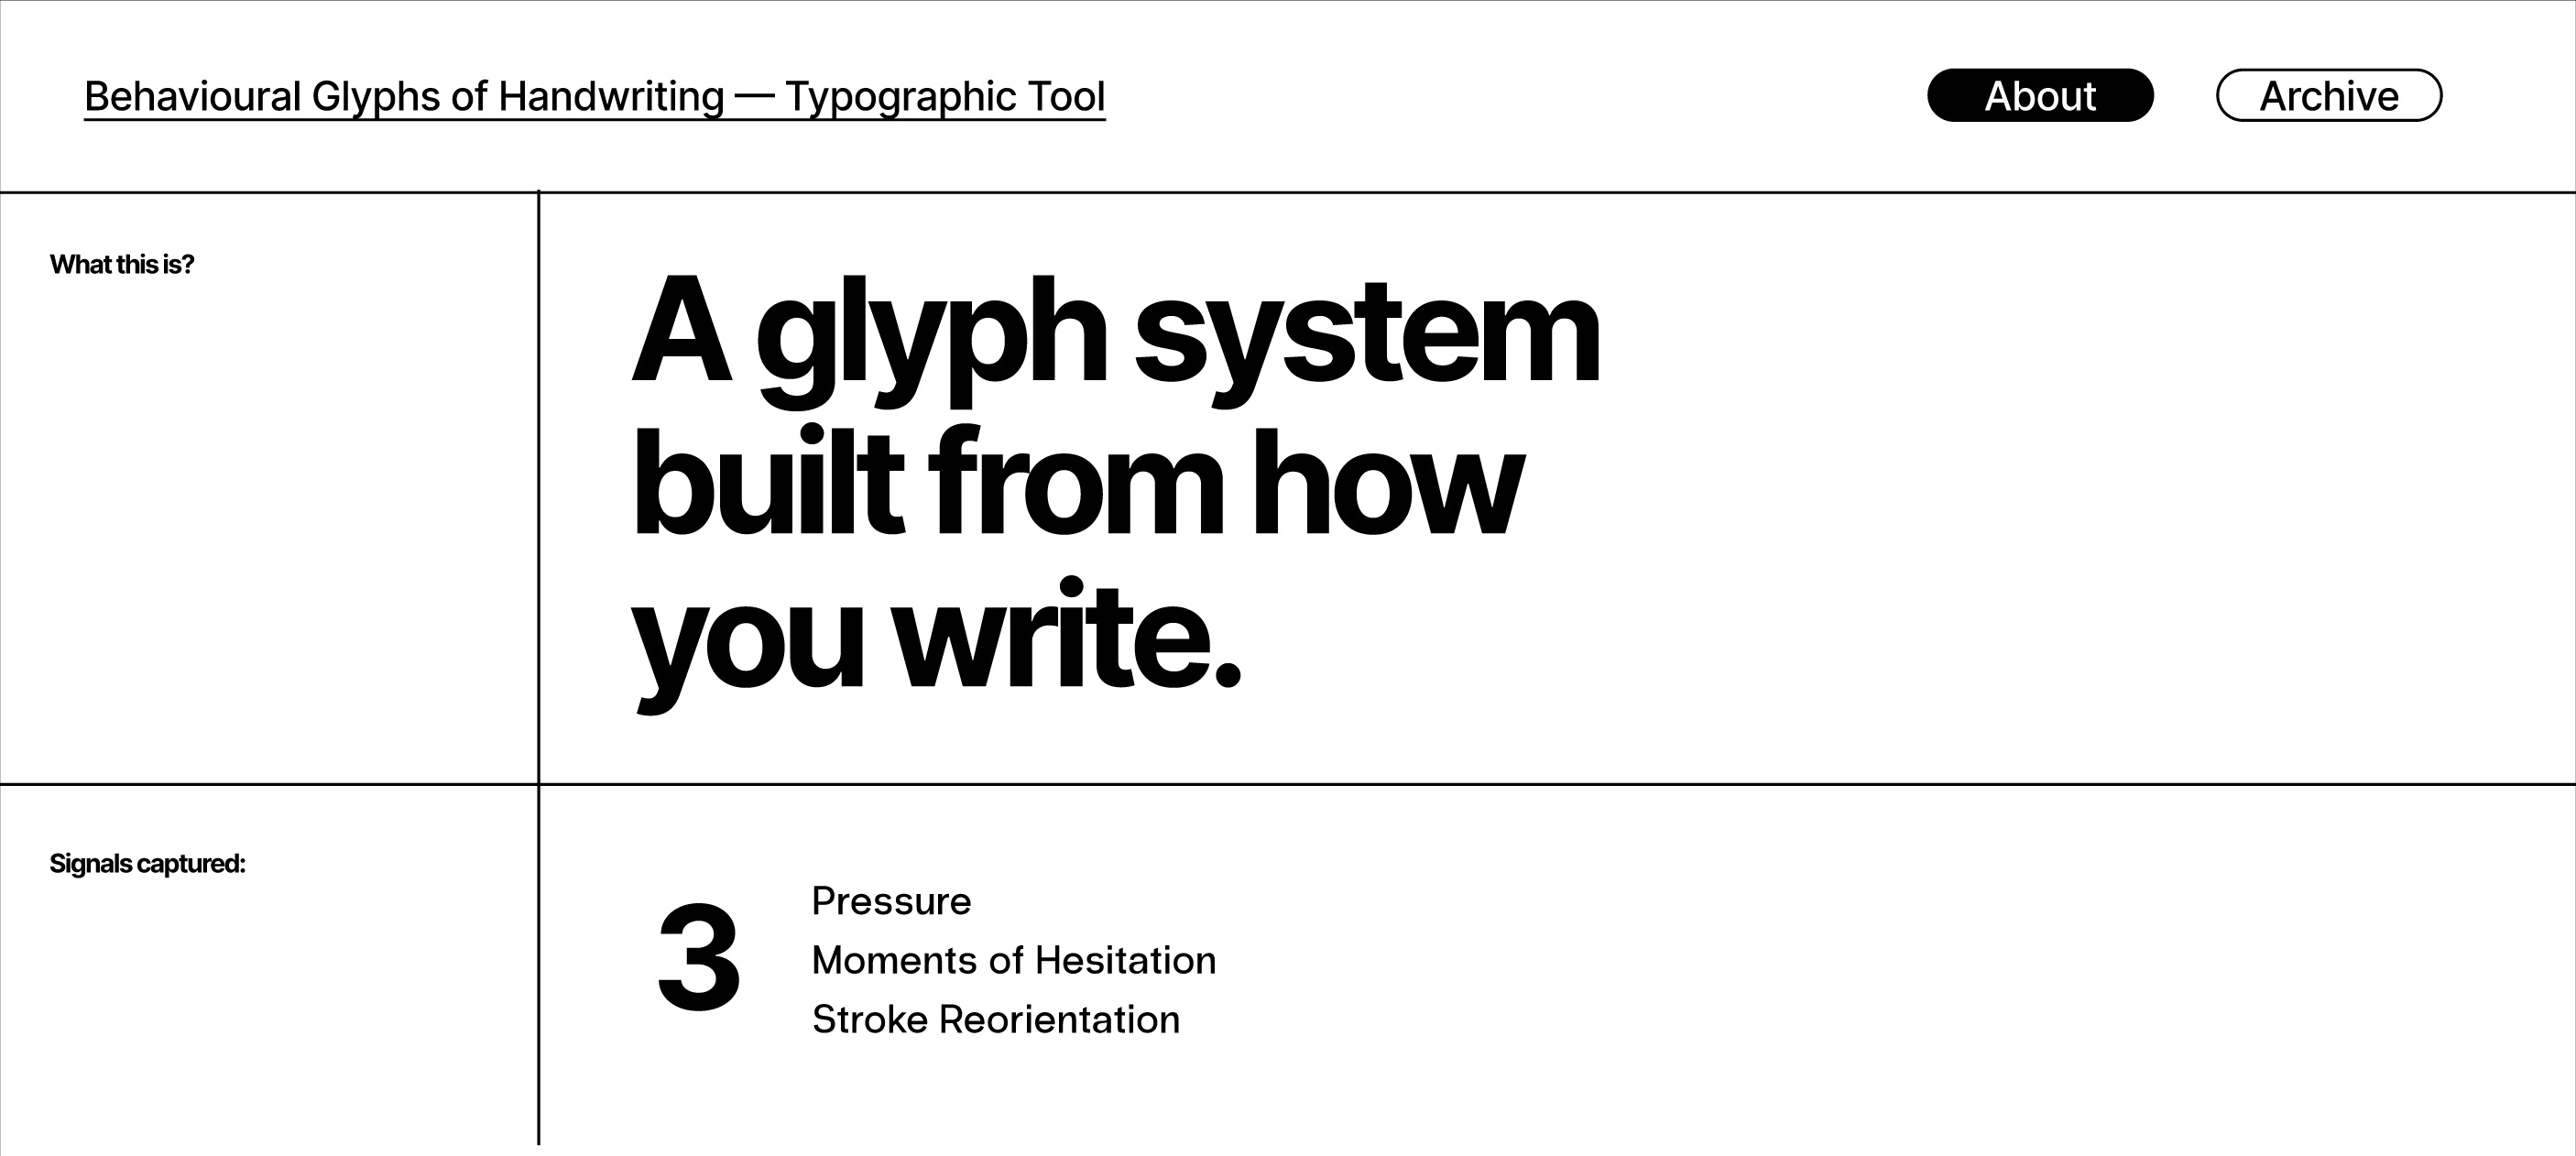
Tutorial
Explaining the system before action begins
-
System breakdown
Explains the three stages of the tool: handwriting input, behavioural readout, and glyph reconstruction, so users understand the process before starting. -
Behavioural signals
Introduces pressure, hesitation, and reorientation as key signals, helping users see what the system is analysing. -
Onboarding transition
Acts as a bridge between explanation and action, guiding users into the capture stage.
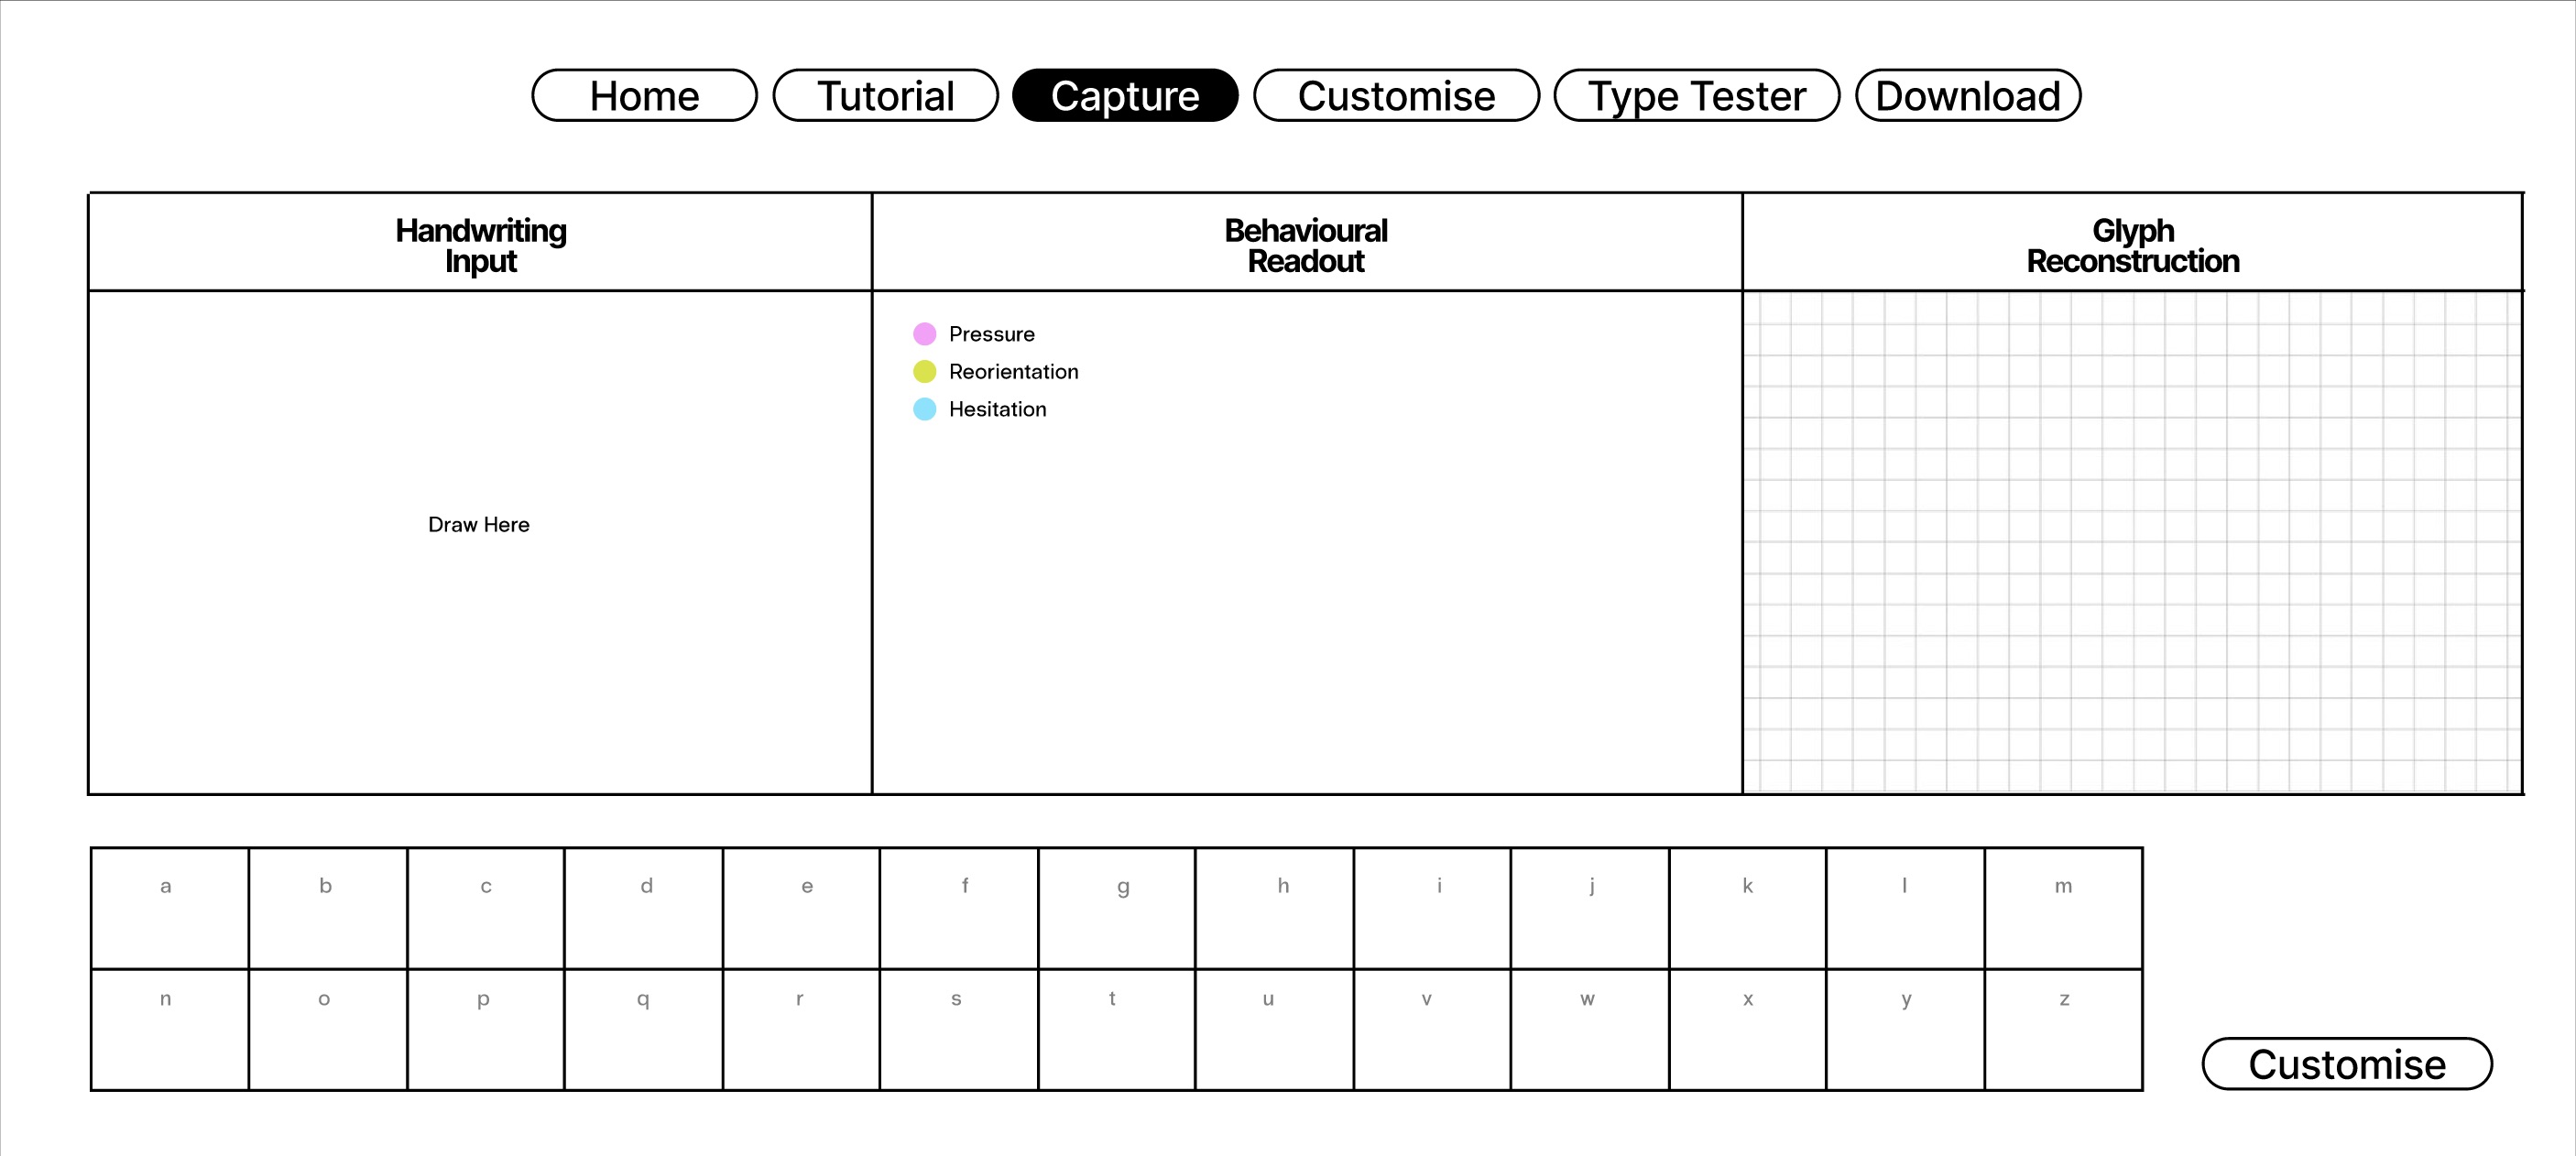
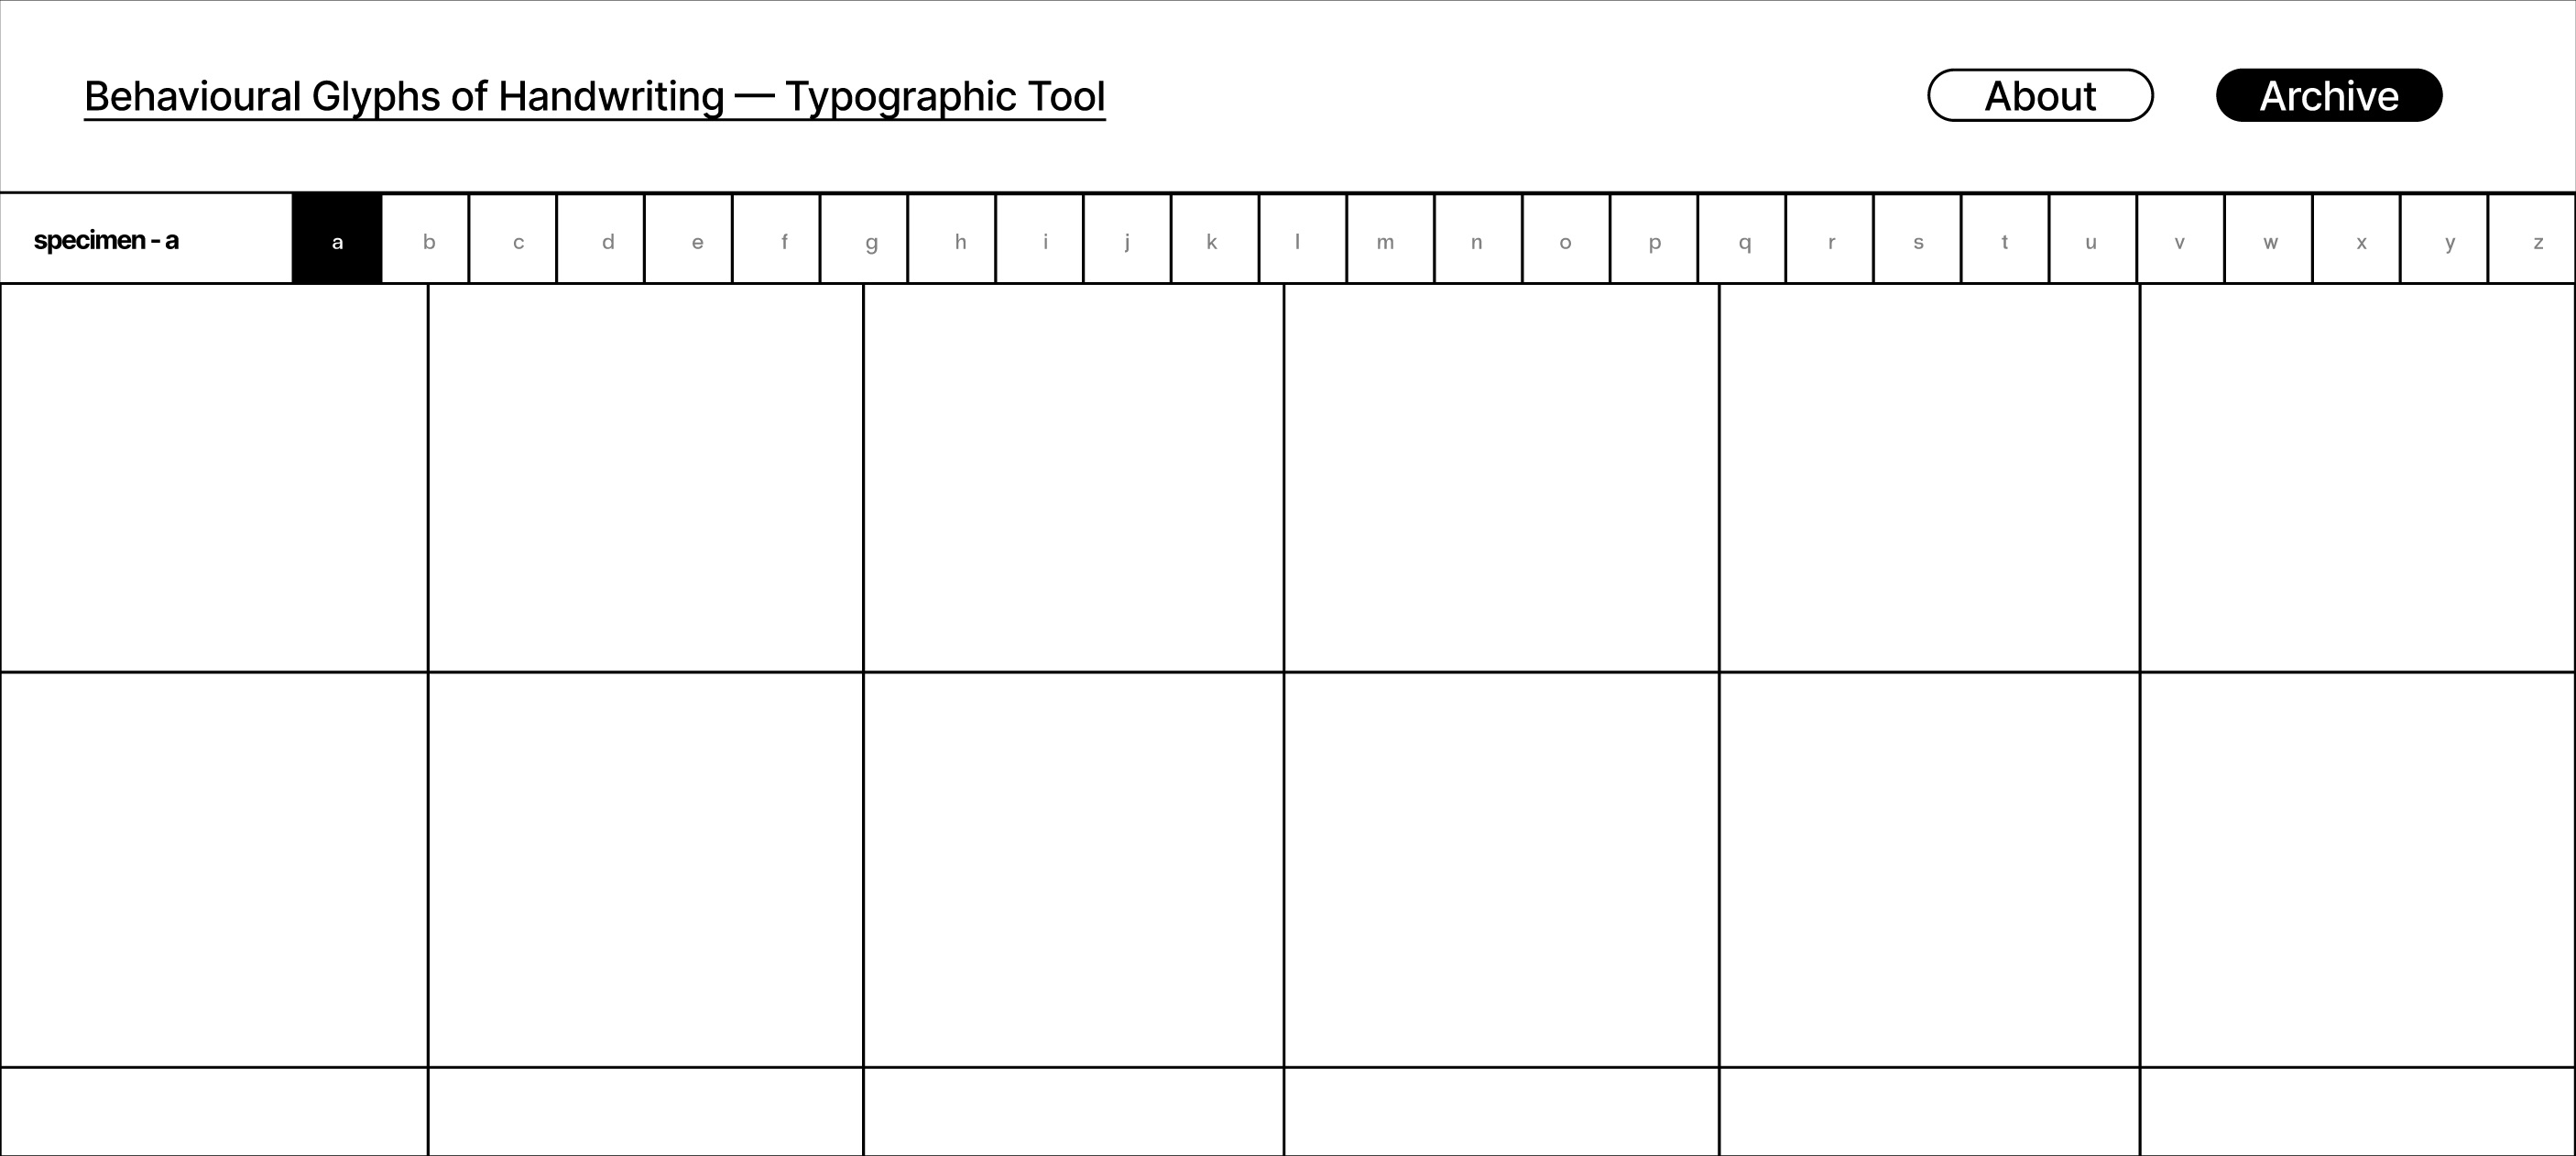
Handwriting capture
The main interaction stage
-
Writing interface
Provides the main drawing area where users input each letter directly, making handwriting the primary interaction. -
Live behavioural readout
Displays how strokes are interpreted in real time, showing the connection between movement and data. -
Alphabet tracking
The a–z grid tracks progress and encourages users to complete the full glyph set. -
System building
Reinforces that users are constructing a full typographic system, not just individual letters.
Customise glyphs
Adjusting the behavioural system
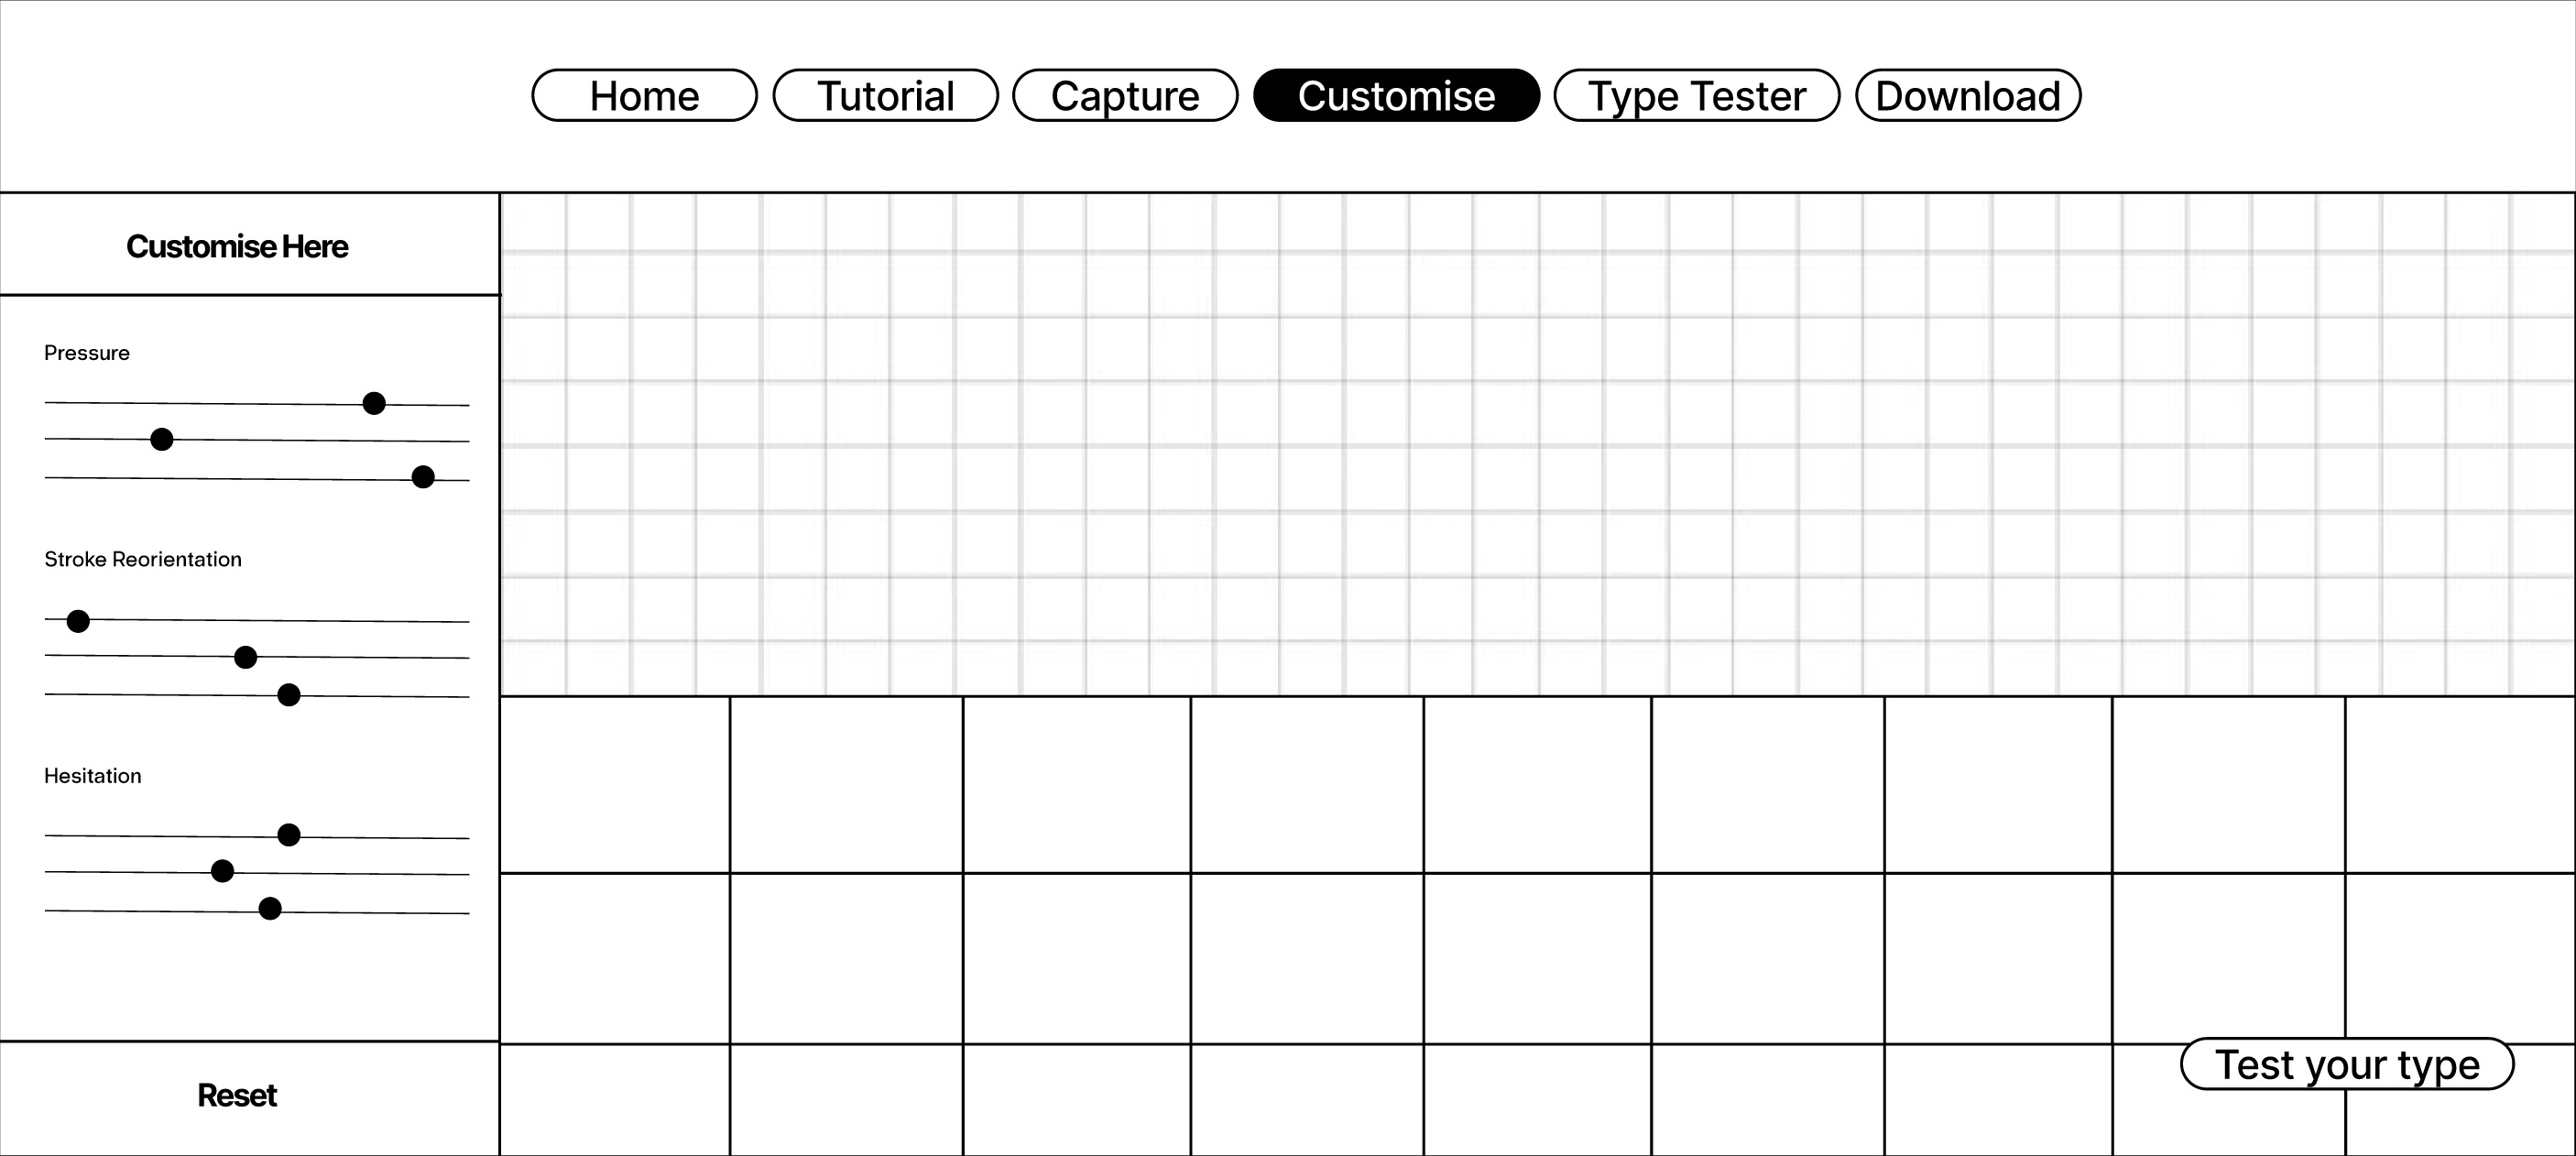
-
Parameter controls
Allows users to adjust variables such as stroke weight, pressure influence, and velocity contrast to shape their glyph output. -
System-wide application
Changes apply across the entire glyph set, maintaining consistency and reinforcing system thinking. -
Visual feedback
Users see changes reflected in real time, making the relationship between input and output clearer.
Type tester
Testing the glyph system in use
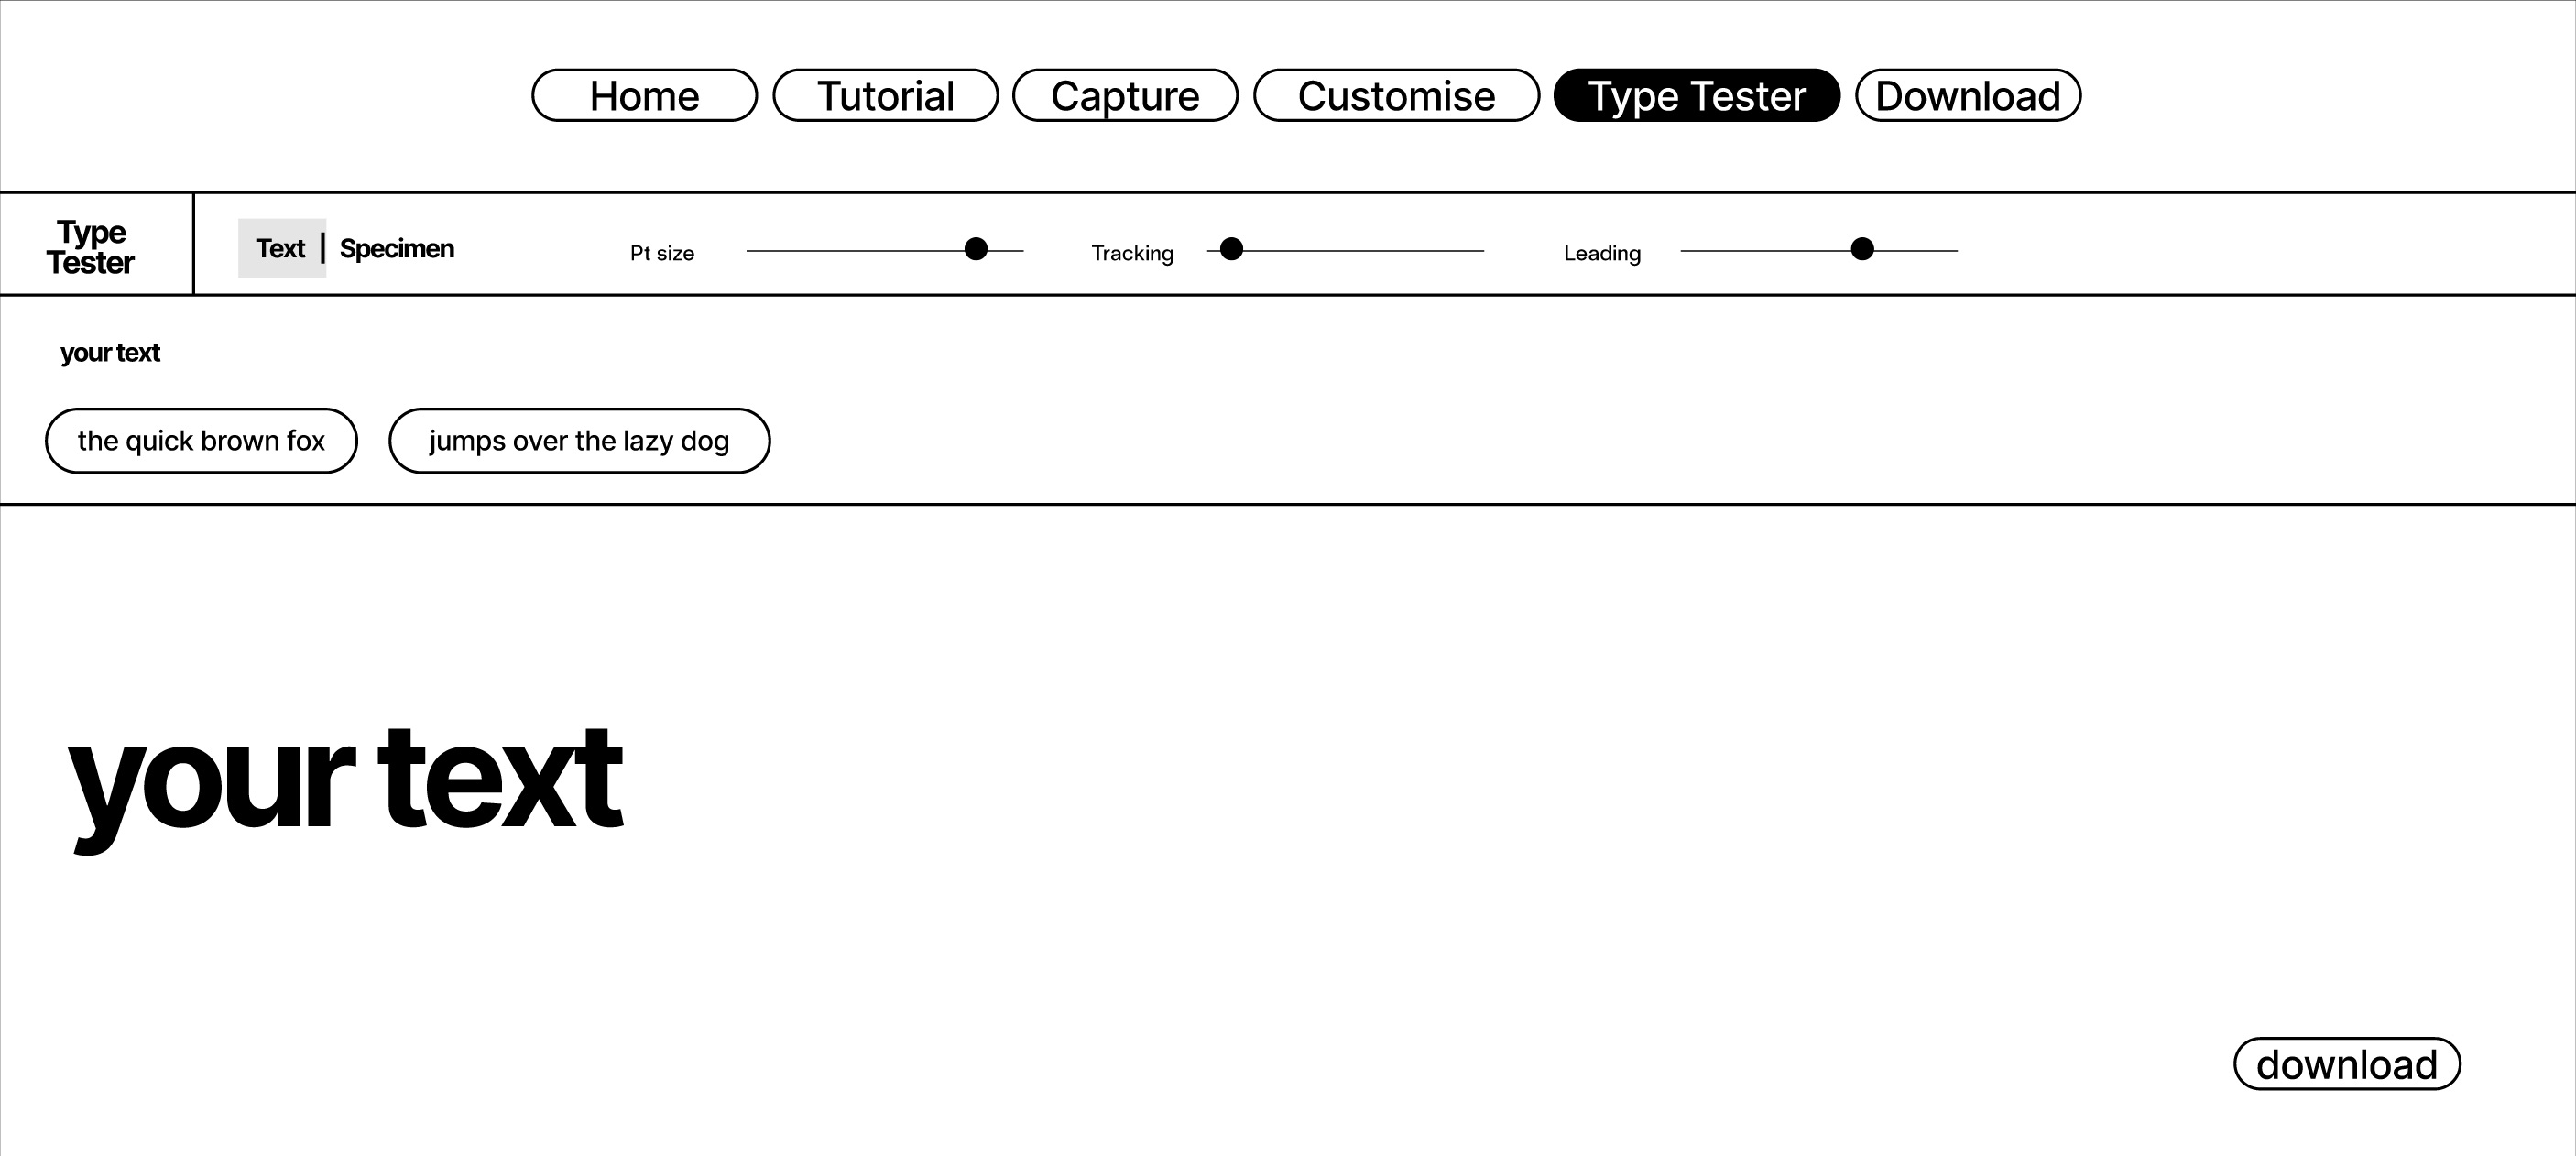
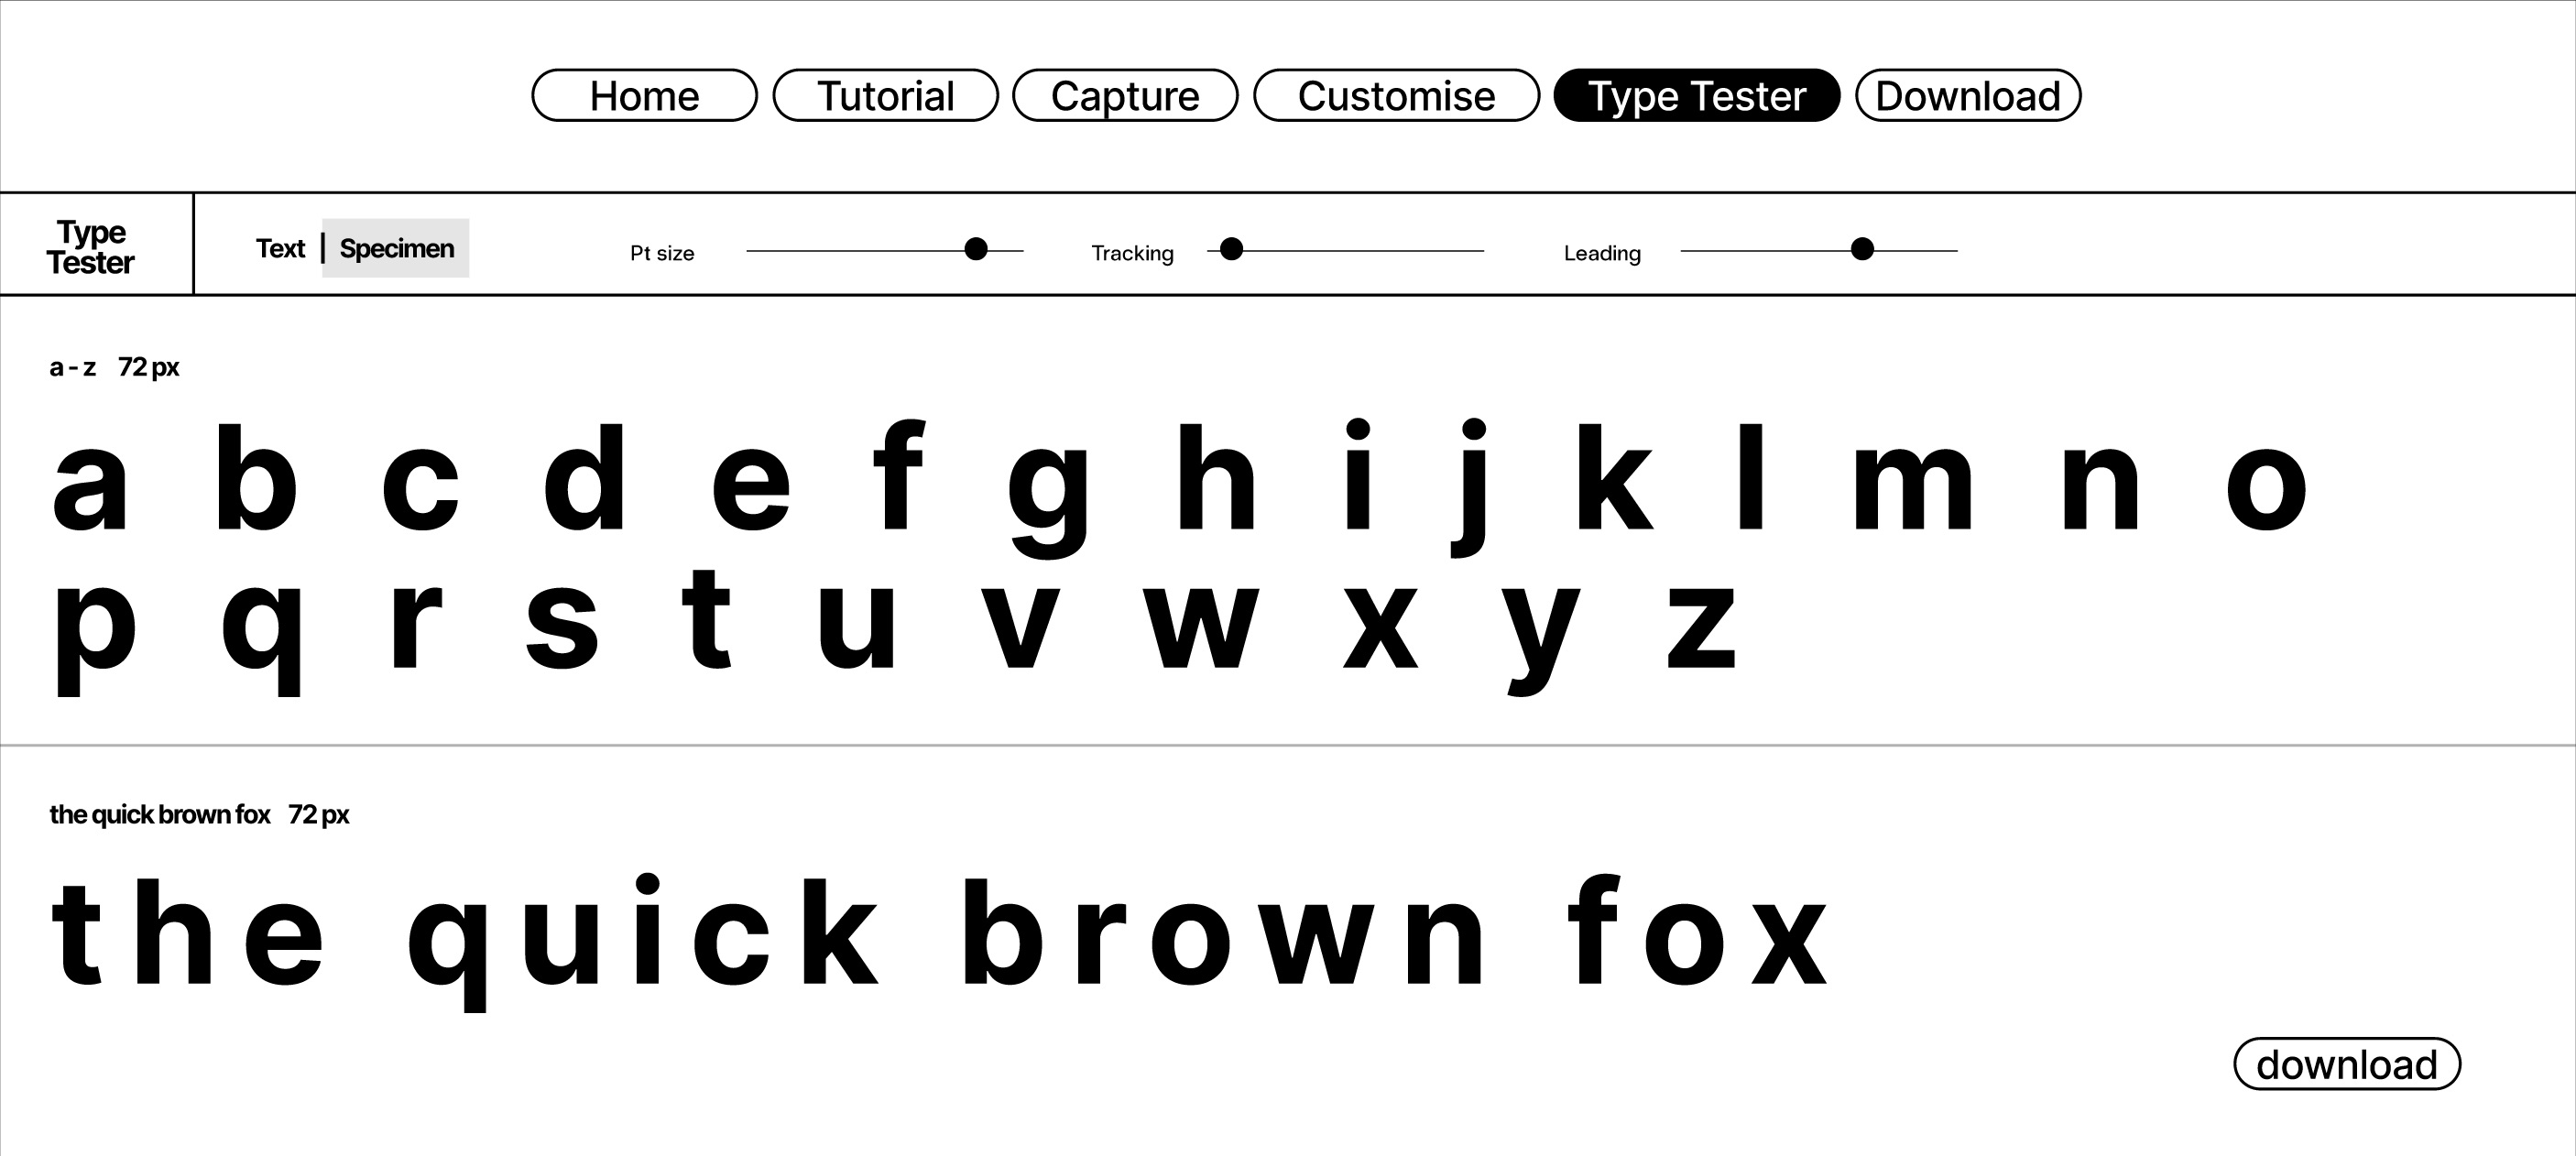
-
Text preview
Users can type custom text to see how their glyph system behaves in sequence and in use. -
Specimen layout
Displays the full alphabet in a structured format, allowing evaluation of consistency and variation. -
Typographic controls
Size, tracking, and leading controls help test how the system performs under different conditions. -
Readability check
Allows users to assess legibility and rhythm across words, not just individual glyphs.
Download
Turning process into result

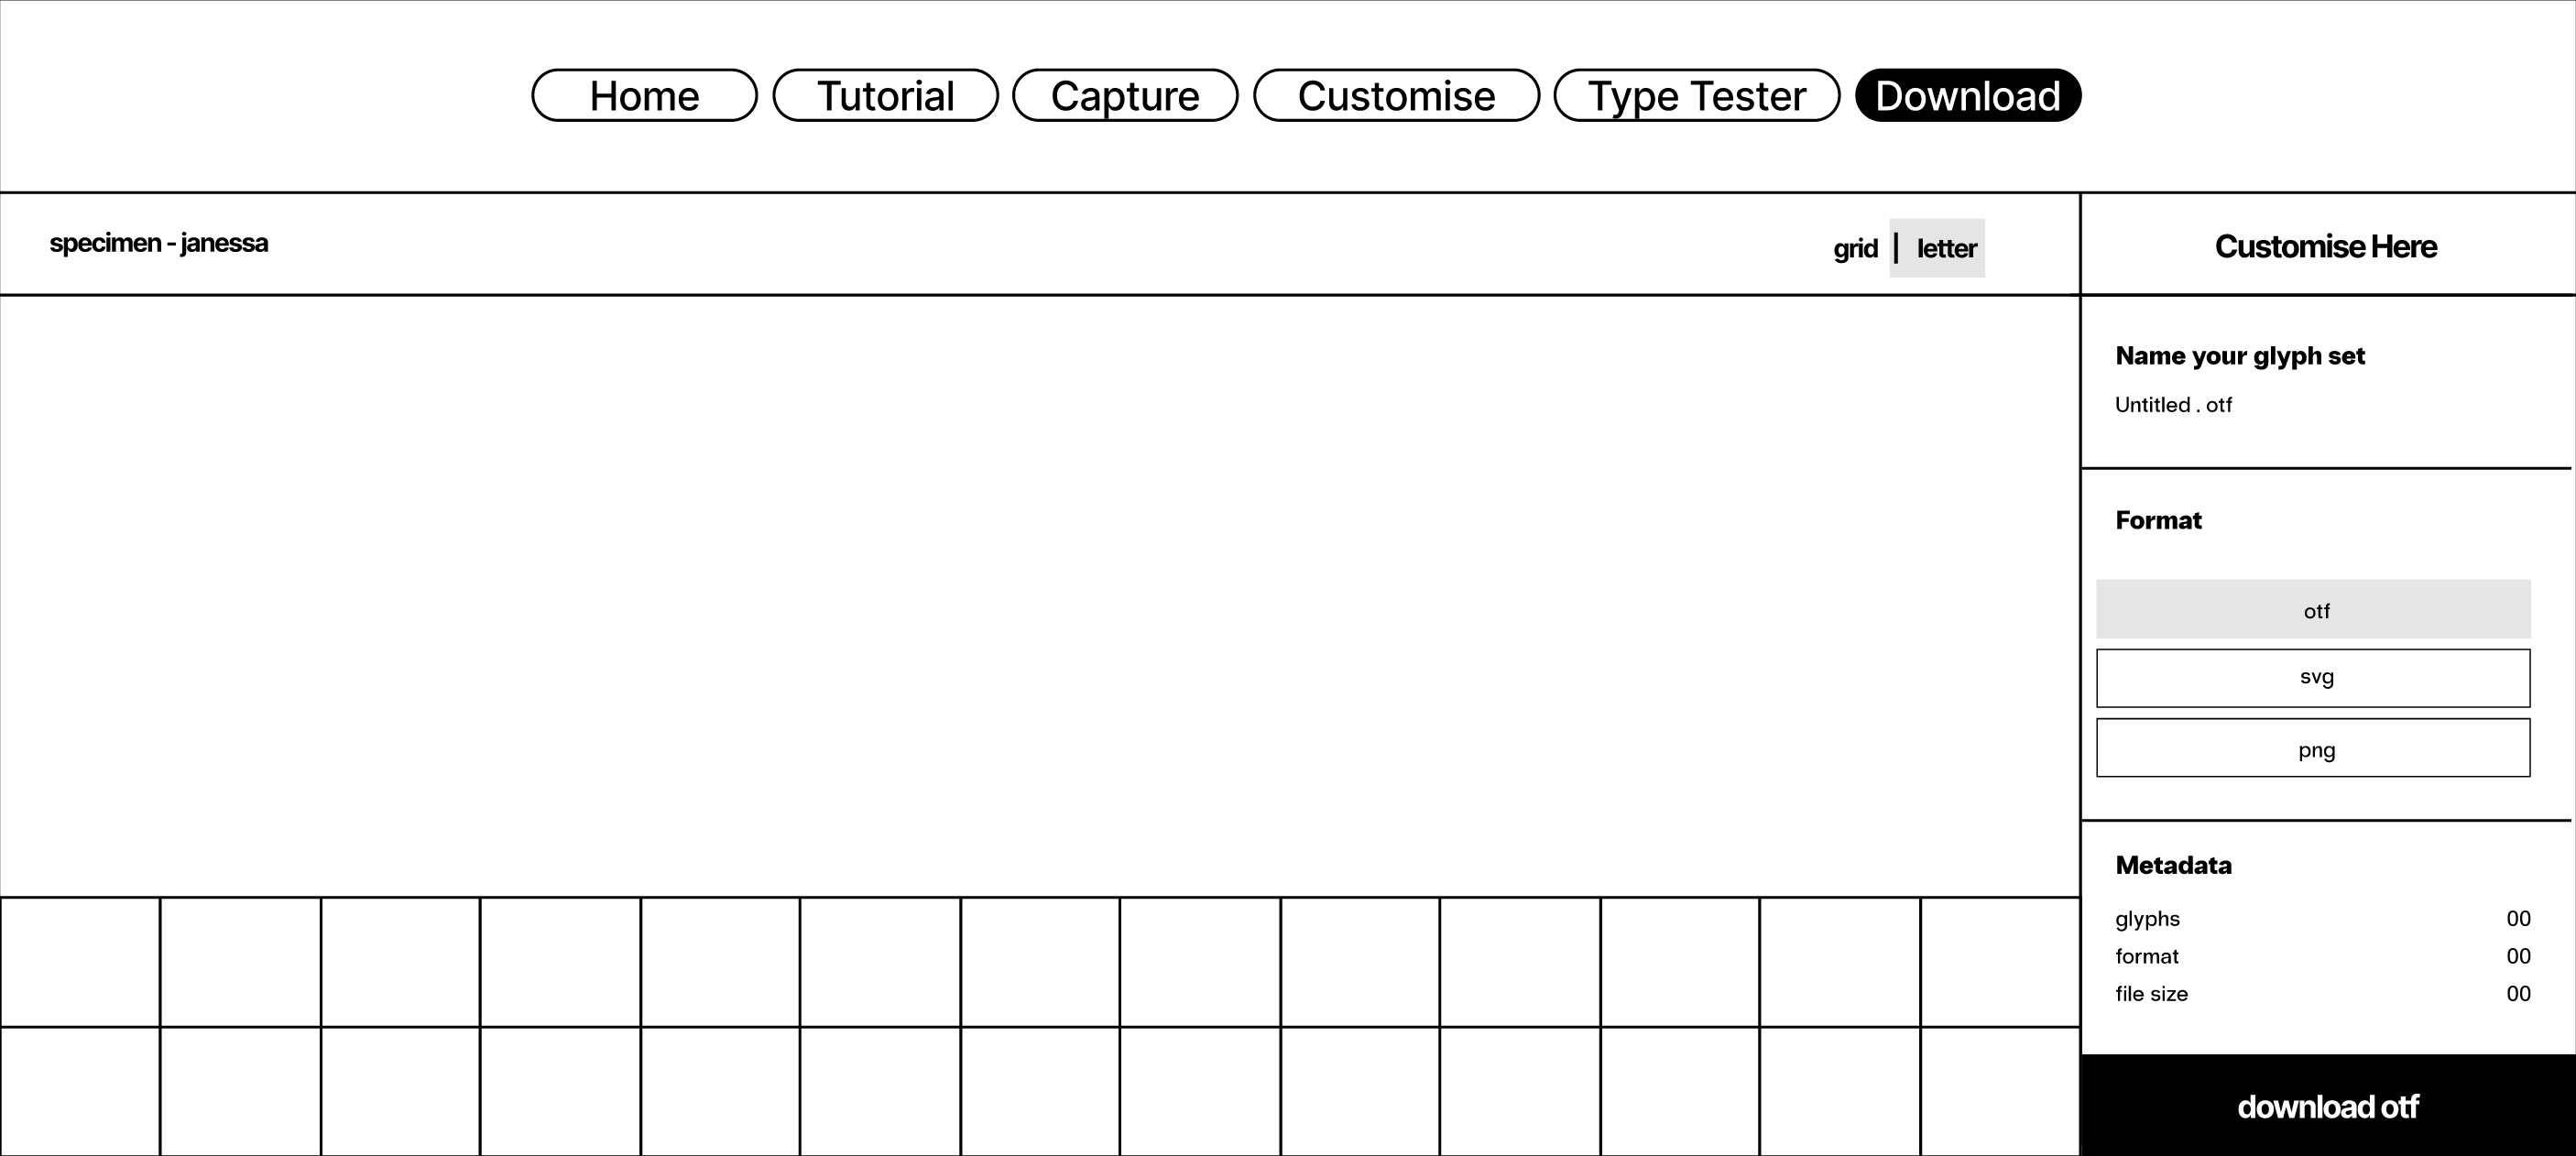
-
Export system
Presents the glyph set as a completed output, transitioning the experience from process to result. -
Format options
Supports multiple formats such as OTF, SVG, and PNG, making the outputs usable beyond the interface. -
Naming and metadata
Allows users to label their glyph set, reinforcing the idea of ownership and completion.
Archive
From one interaction to a comparative system
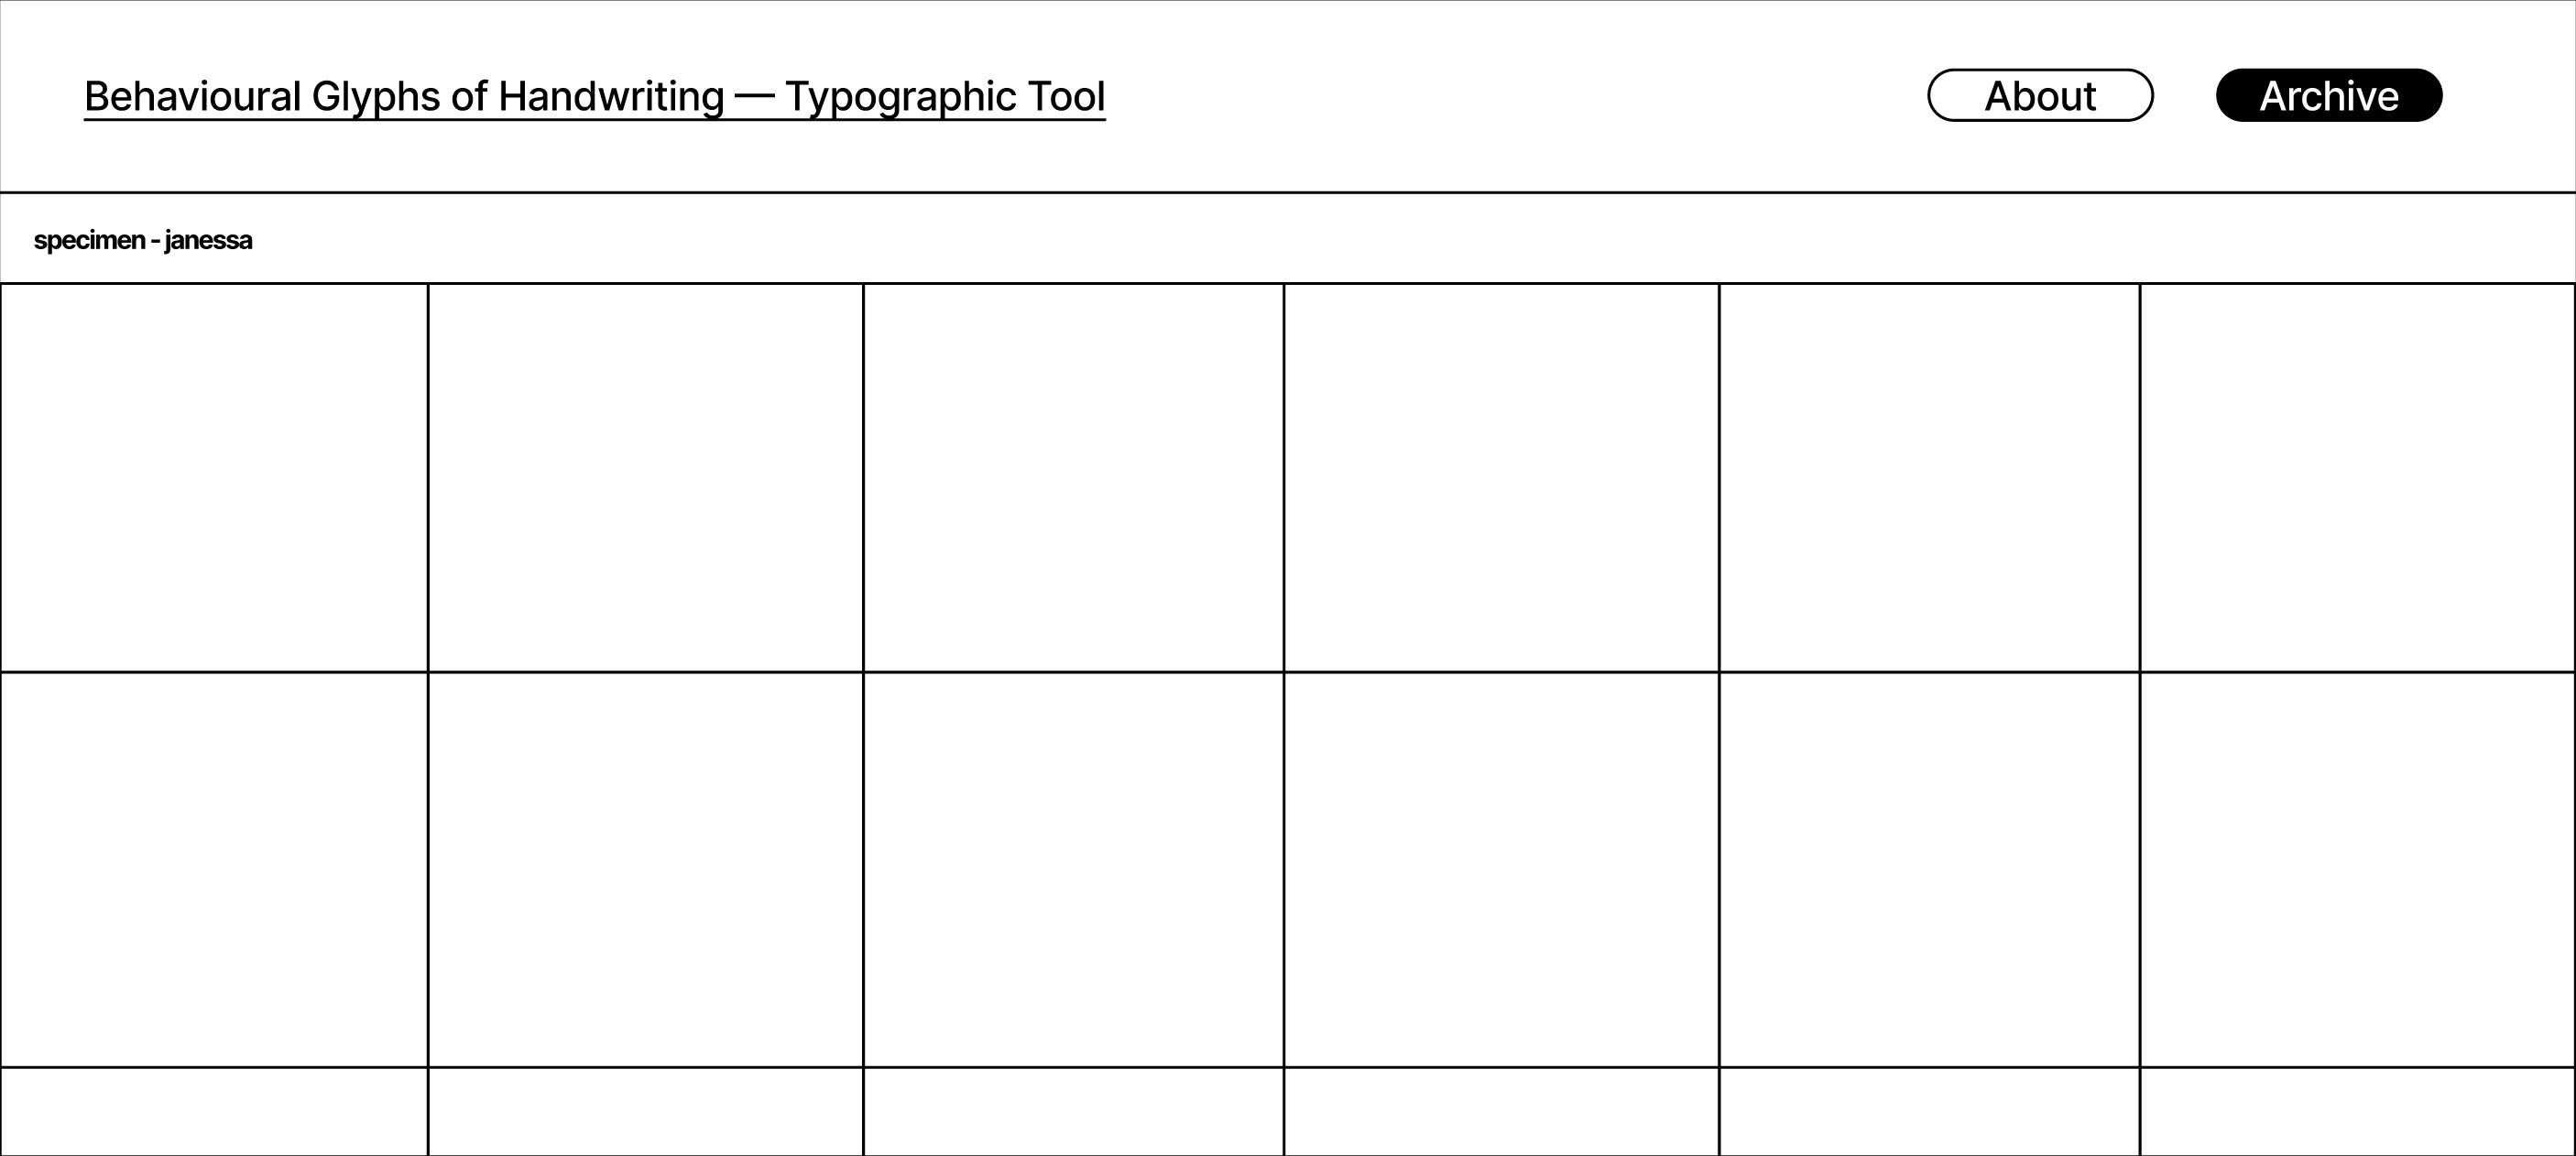
-
A–z overview
Displays glyph sets in a grid format, making it easy to scan and compare different outputs. -
Individual sets
Users can open a full participant set to examine details and variations more closely. -
Comparative system
The archive allows multiple outputs to exist together, showing differences between behaviours. -
Extended context
Shifts the project from a single interaction into a growing collection of typographic systems.
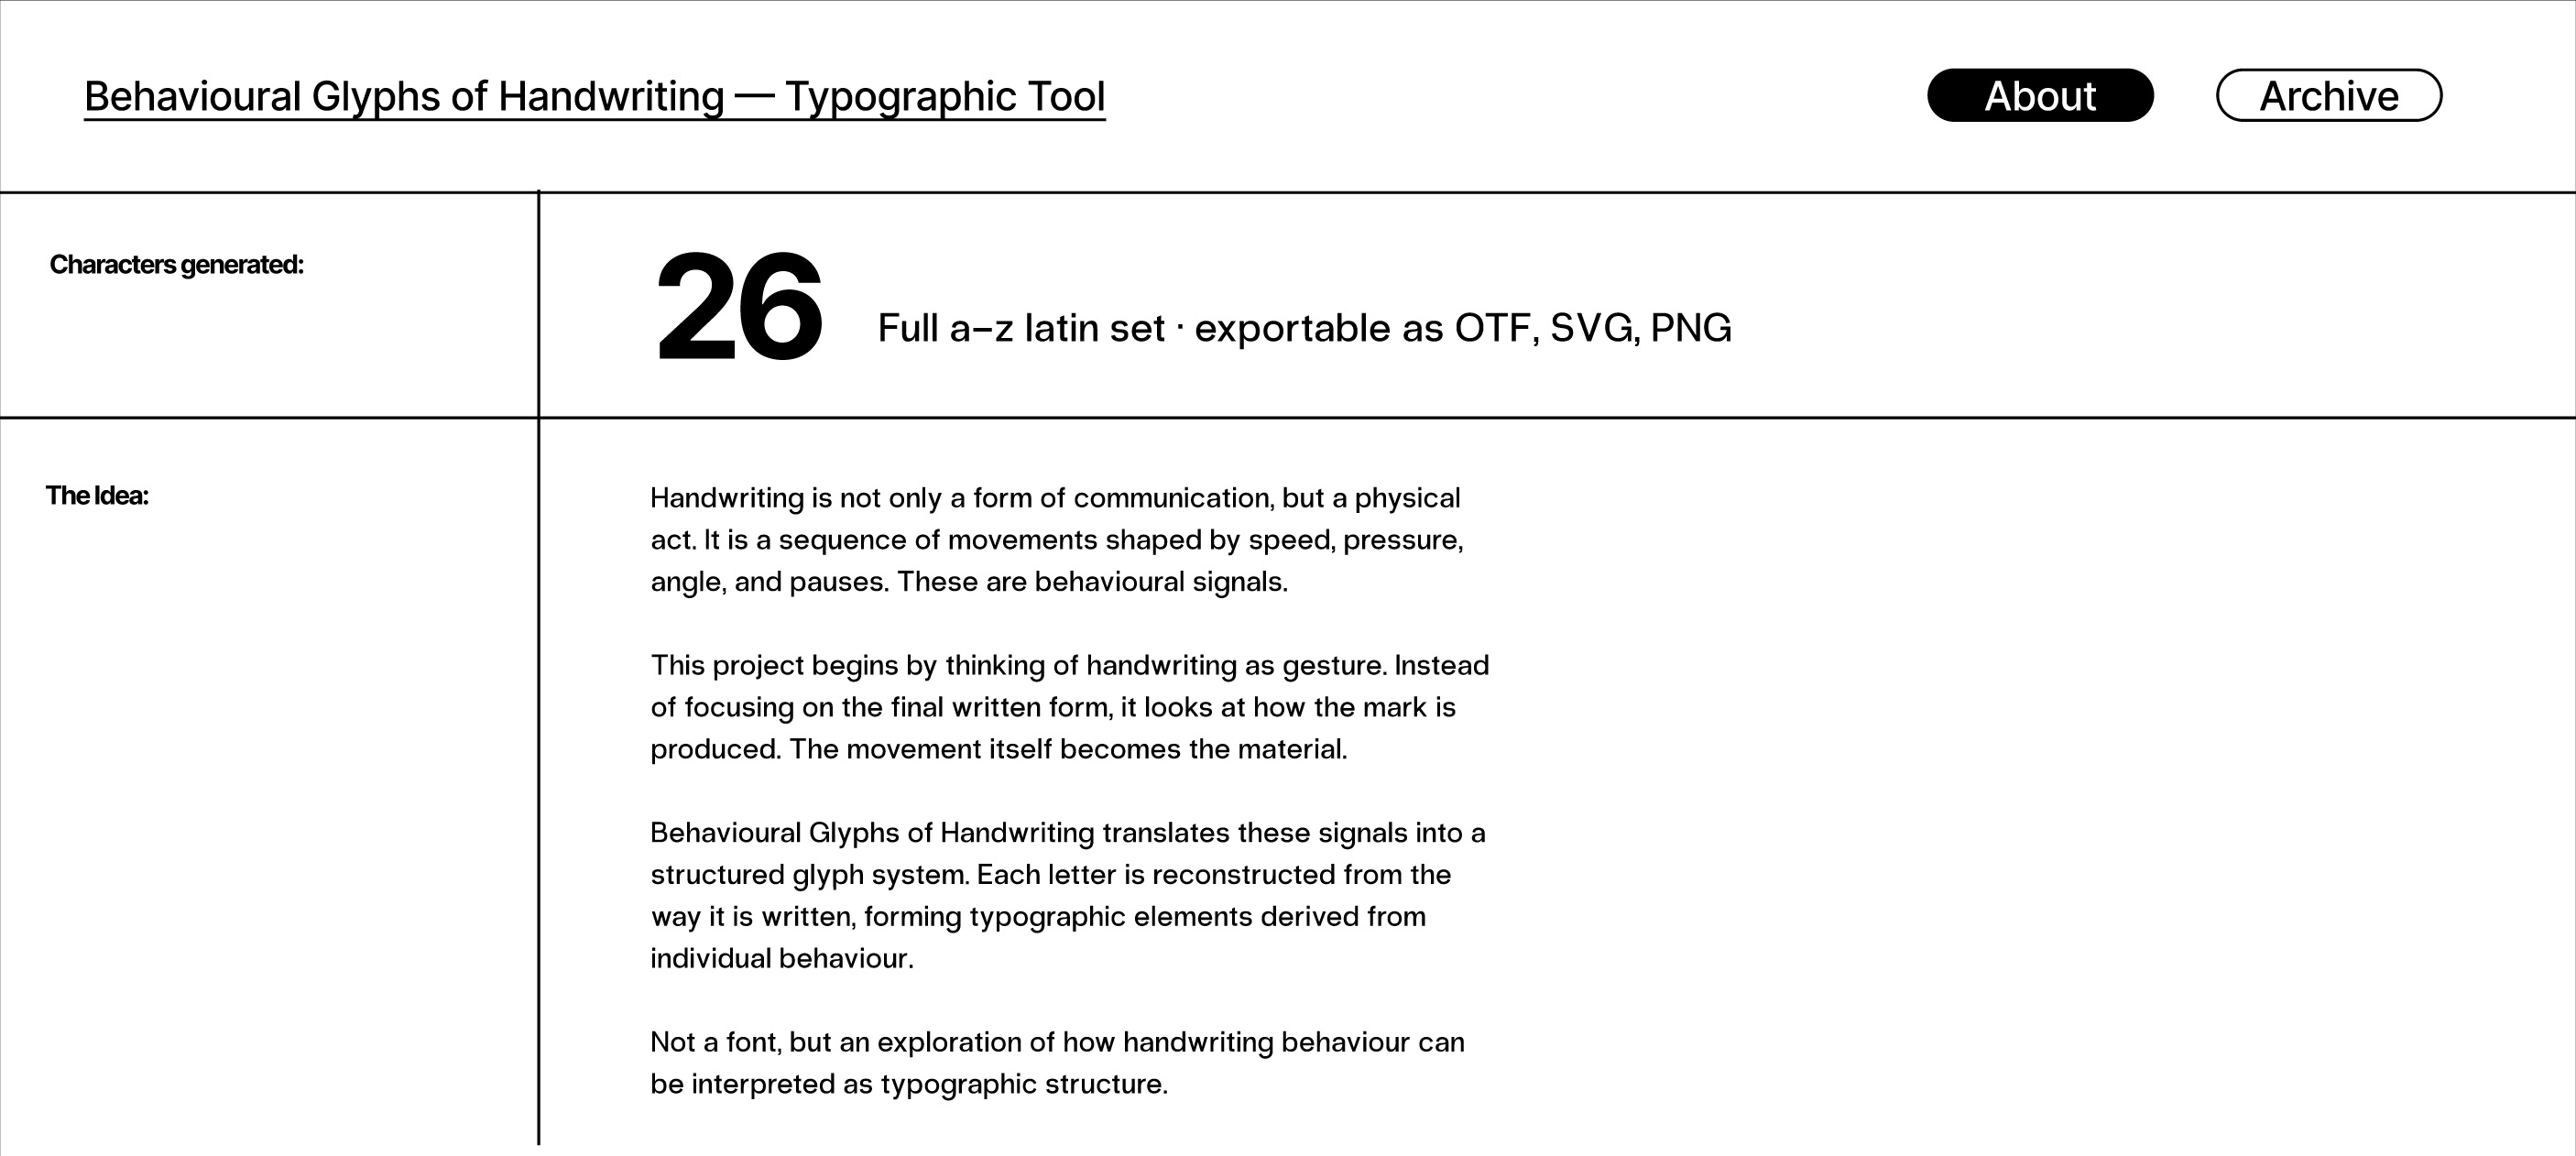
About
Framing the project and its logic
-
Project introduction
Explains the idea that handwriting is a behavioural act, not just a visual outcome. -
Signals explained
Outlines the key behavioural signals used to generate the glyph system. -
Concept framing
Positions the tool as an experimental typographic system rather than a finished font product.
[ High-fidelity wireframe ]
Prototype refinement
Clickable interface and stronger visual hierarchy
-
Visual system refinement
The interface is developed with clearer hierarchy, contrast, and spacing to improve readability and focus across all pages. -
Interactive prototype
The prototype is clickable and simulates user flow across the tool, though the actual behavioural processing is not yet functional. -
System clarity
Compared to mid-fidelity, this version makes the overall structure and purpose of the tool easier to understand. -
Interaction intent
Transitions, buttons, and layouts are designed to guide users smoothly through each stage of the process.
[ Andreas feedback ]
Feedback after review
Ready to move into implementation
-
01 Ready to move forward
The structure and interface are clear enough to begin development without further redesign. -
02 Implement behaviour logic
Focus on integrating behavioural signals into the system, including how data is processed and applied. -
03 Explore data and animation
Look into how JSON and animation can enhance feedback, especially in the customisation stage. -
04 Expand outcomes
Consider translating outputs into physical formats such as silkscreen to explore analogue and digital differences.
[ Plan for open studios ]
Planning public display
Showing both system and development
-
01 Show development process
Use a timelapse to show how the website and code evolve over time. -
02 Capture progression
Look into tools that automatically take screenshots at intervals to document changes. -
03 Look at physical collaterals
Present workshop outcomes, and maybe look into silkscreen and 3D printing of stamps.
[ Workshop direction ]
Shifting workshop outcomes
From namecards to posters and live interaction
-
01 Shift to posters
Move from namecards to posters as the main outcome to make results more visible and impactful. -
02 Tool as experience
Use the workshop to let participants interact with the system directly. -
03 Document interaction
Capture video of users engaging with the tool and producing outputs. -
04 Capture energy
Record the atmosphere and responses to show the project as a live system.
[ Next step ]
Make the website work
Integrate behavioural signal logic and connect all interaction stages so the tool functions as intended.
[ Next step ]
Plan for workshop
Define structure, outputs, and documentation approach to support participation and capture results.
[ Next step ]
Plan for open studios
Prepare materials that show both the system and its development, including interface, process, and outputs.