WEEK 15
Prototype 02 — Gesture → Data → Material
Capturing, translating and comparing the loop
This week I finally ran a full line through the system: from embodied gesture to digital trace to embossed foil. Prototype 02 focused on a single continuous loop, performed by four participants, translated into data through Gesture Studio and then reinterpreted through tracing on aluminium plates and a comparison booklet.
Whole pipeline, one gesture
Instead of scattered tests, this experiment followed one instruction across stages: draw a loop, capture it, print it, emboss it and compare.
Participants as co makers
Four people performed the same loop, showing how rhythm, drift and pressure create different versions of “the same” gesture.
Foil and booklet as record
The embossed plates and ring bound booklet turned each loop into a tangible artifact, making translation and difference easier to see and feel.
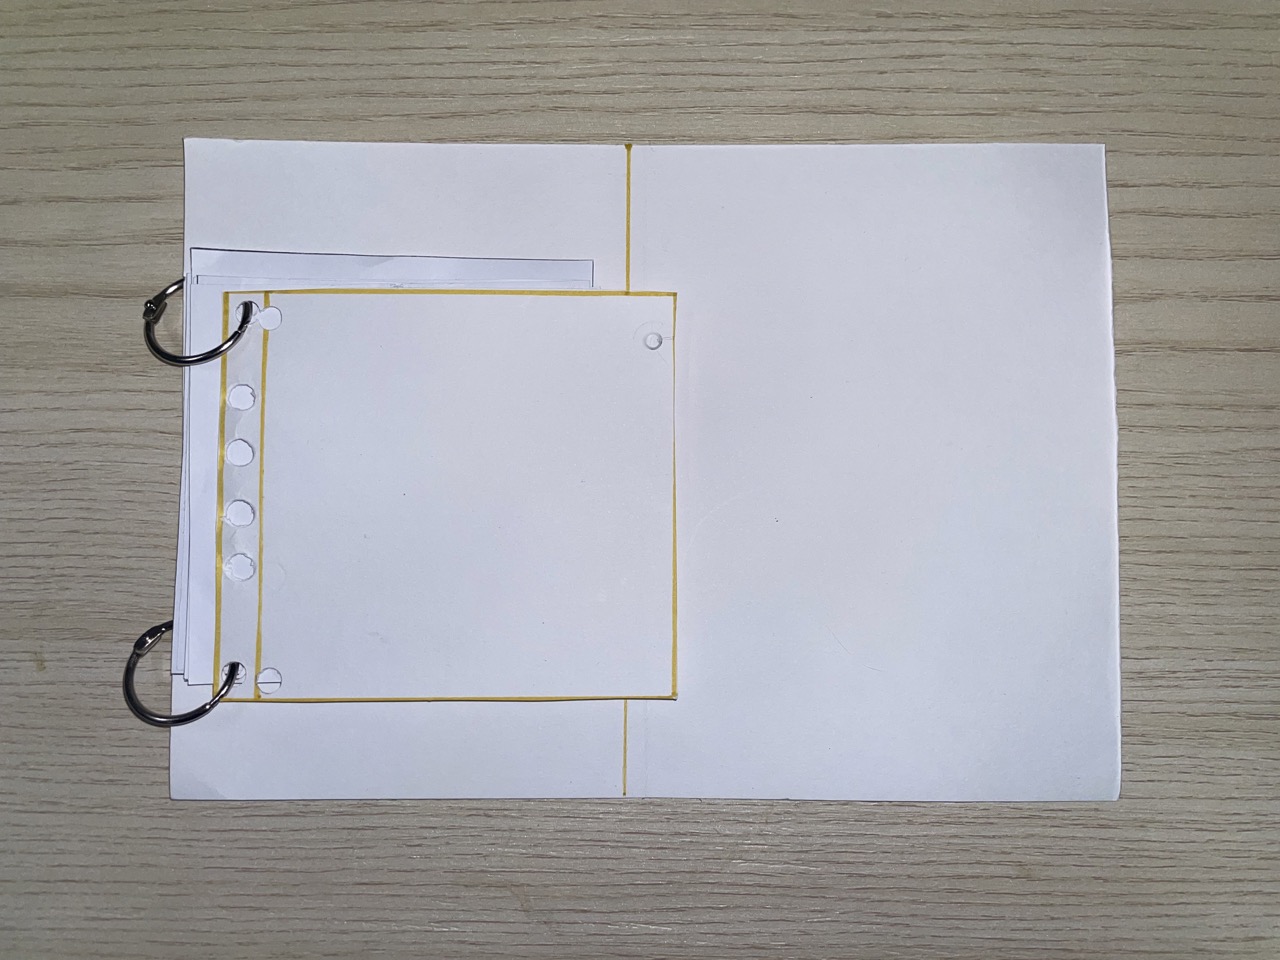
[ 1. Preparing the foil plates ]
From food trays to 9×9 plates
Making a consistent surface for the loop
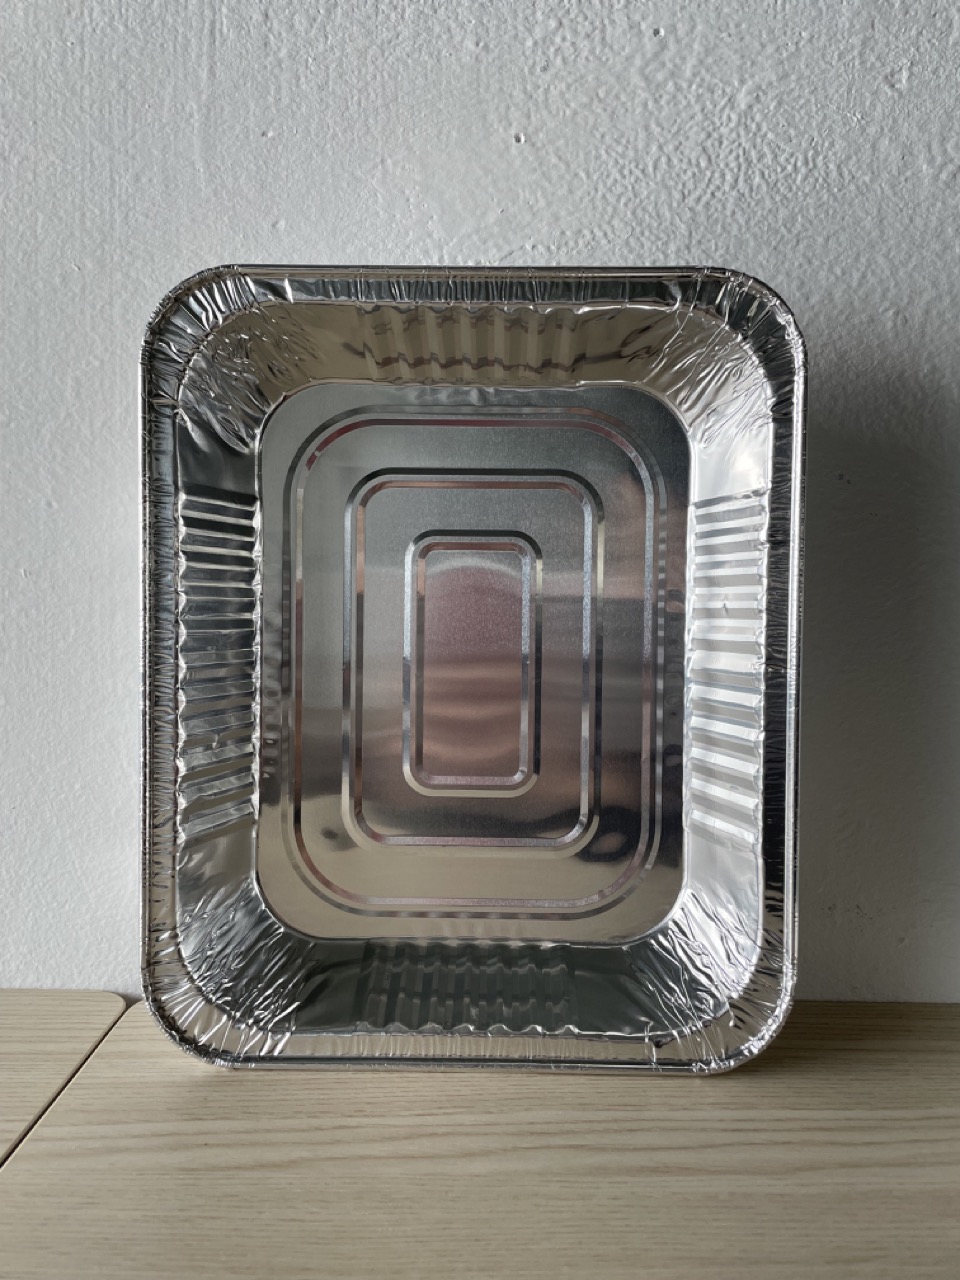
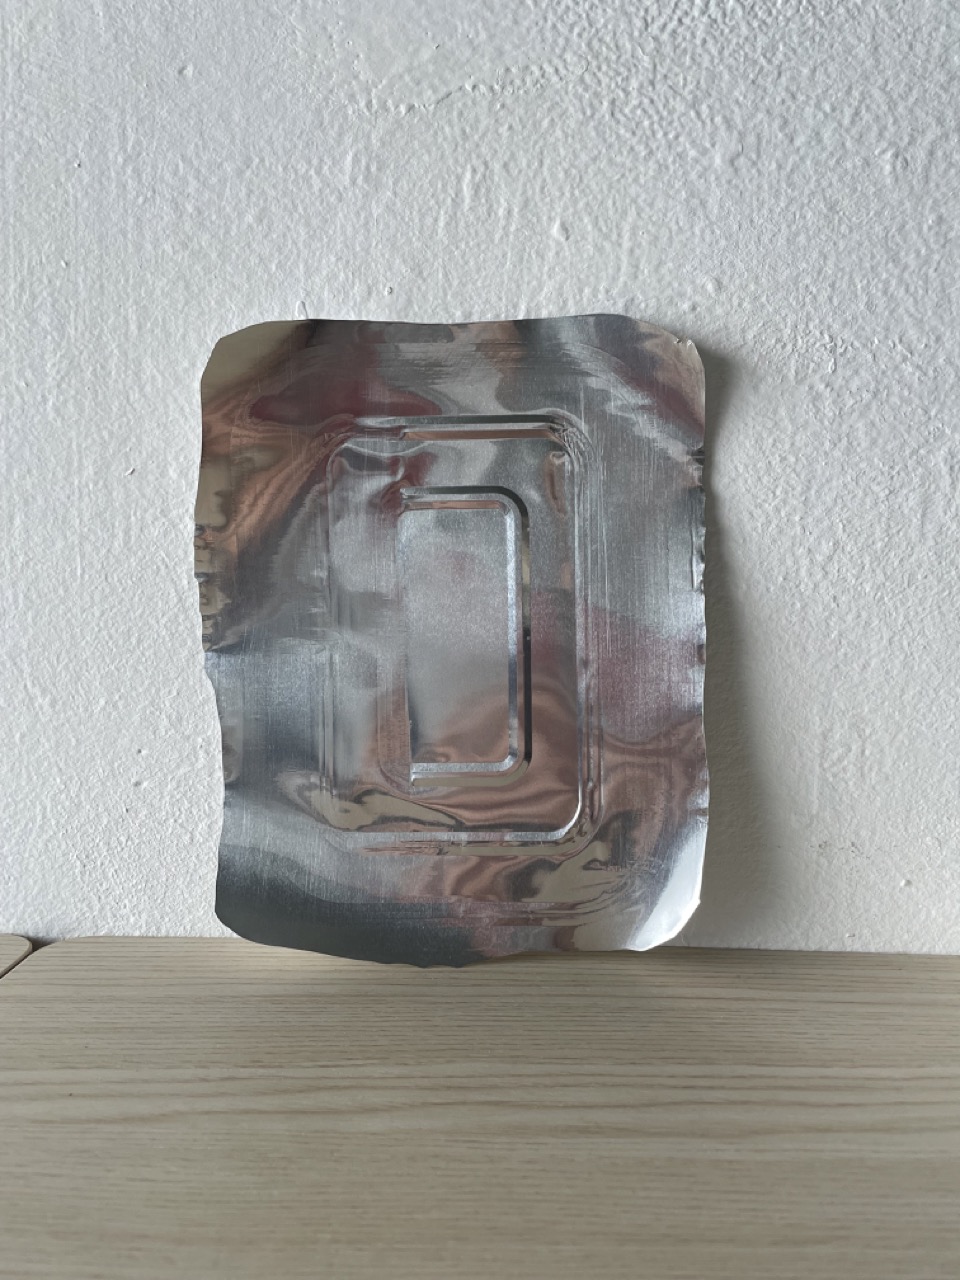
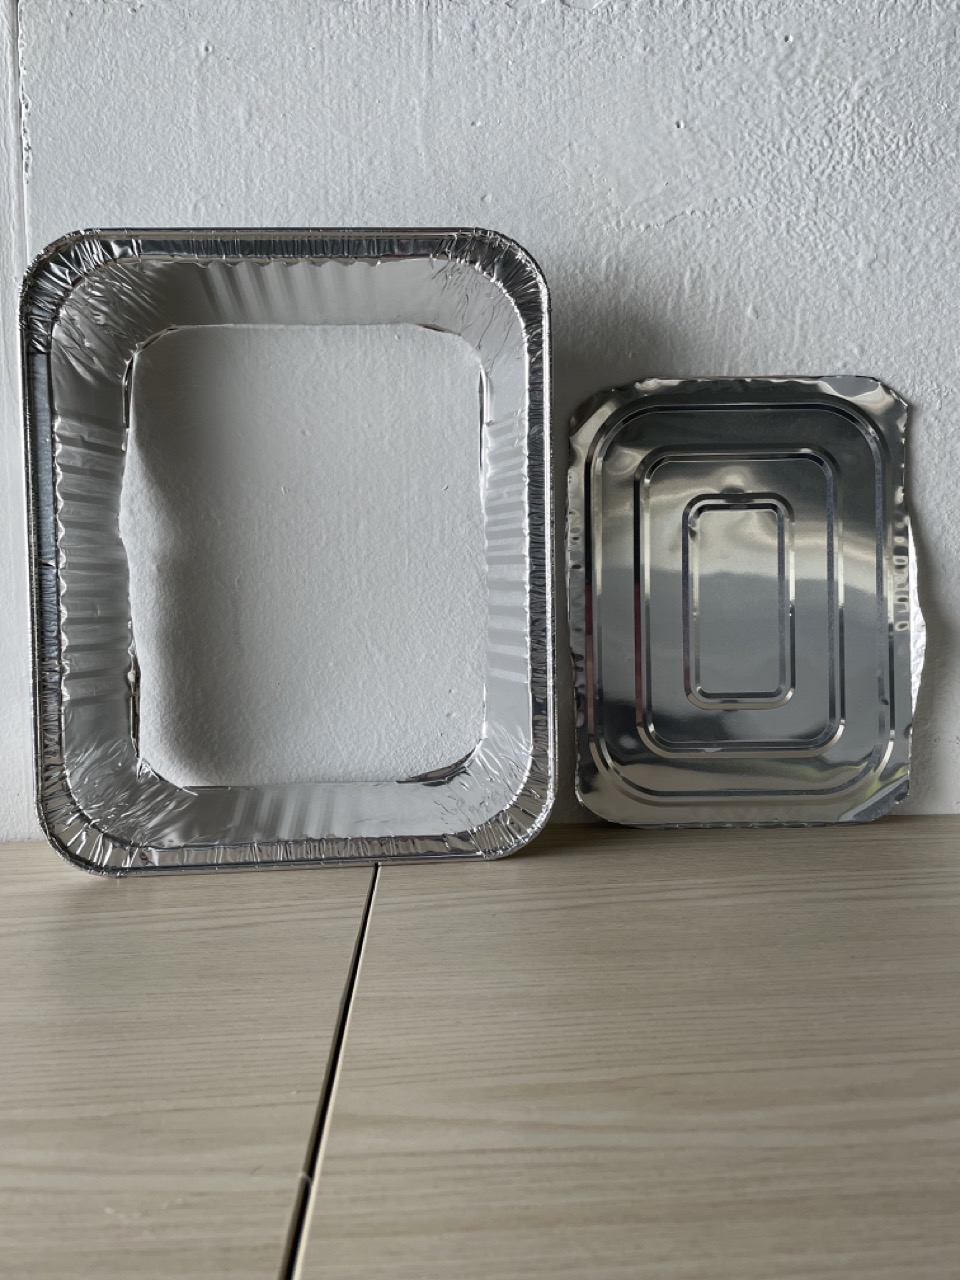
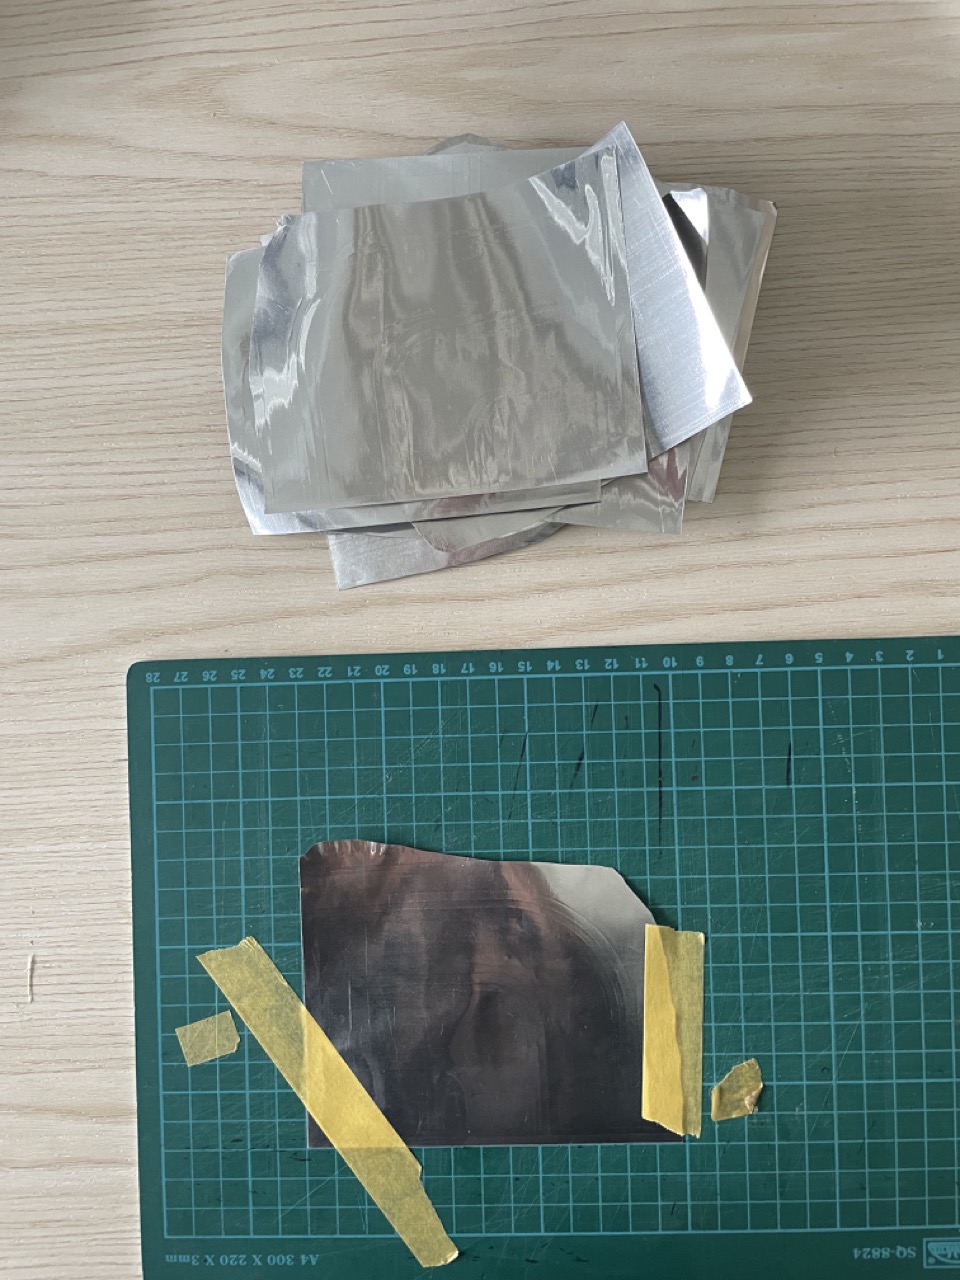
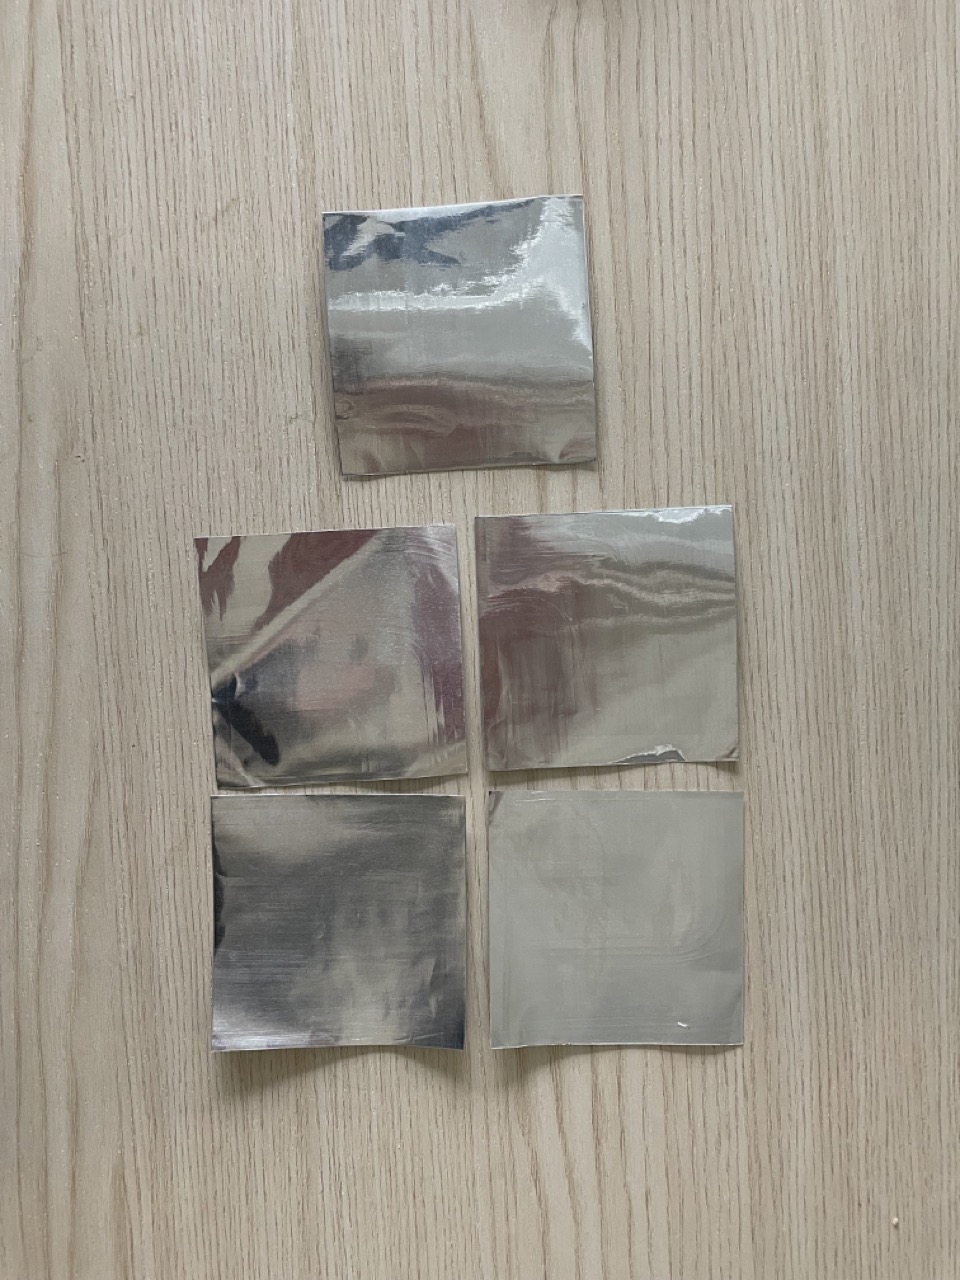
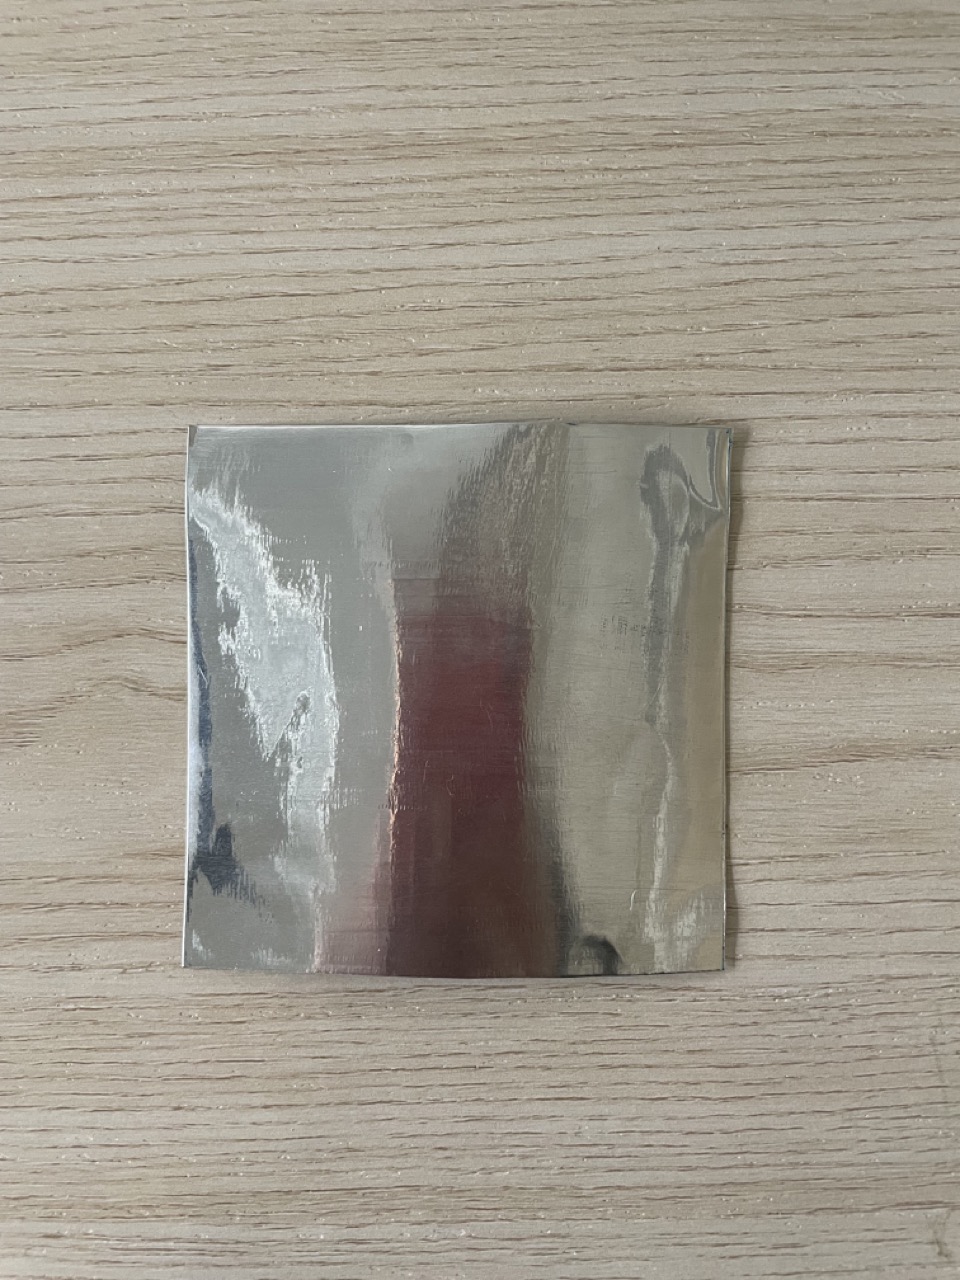
I started by preparing the aluminium plates. I bought aluminium food trays and cut out the flat base. Even after smoothing with a bone tool, faint scratches remained, but the surface was clean enough for embossing. I cut the plates into even 9×9 squares to match the Gesture Studio output.
[ 2. Testing how the foil holds trace ]
Hand vs tool
Finding the right way to draw into aluminium
Before involving participants, I tested how aluminium responds to different forms of pressure. I compared hand made marks (fingernails, folding, crushing) with tool made marks using a stylus.
Fingernails only produced light scratches unless the foil was folded or crushed. The stylus was much more responsive. Light pressure created soft surface lines; heavier pressure produced deep, sharp grooves. This confirmed that the stylus would give the clearest trace when participants emboss their loop.
[ 3. Gesture capture in Gesture Studio ]
Four people, one instruction
Continuous loop in the air for ten seconds
With the foil ready, I invited four participants to perform a continuous loop in Gesture Studio. The rule: draw a loop in the air for ten seconds and stop when the timer ends.
Everyone stayed within the ten seconds. No one produced a perfect loop. Each person’s movement carried its own rhythm, pacing, drift and pauses. Even my own loop was not fully stable. Seeing the four recordings side by side made the individuality of each gesture very clear.
[ 4. Tracing the loop onto foil ]
From print to plate
Filming how each person embosses the loop
Next, I filmed each participant tracing their printed loop onto a foil plate. I captured both top and front
views to compare posture, pressure and direction.
Some participants traced lightly along thinner parts of the line. Others, like Rene, focused on making sure
every segment was embossed strongly. Some did a single pass; others layered multiple passes and built up
overlapping dents.
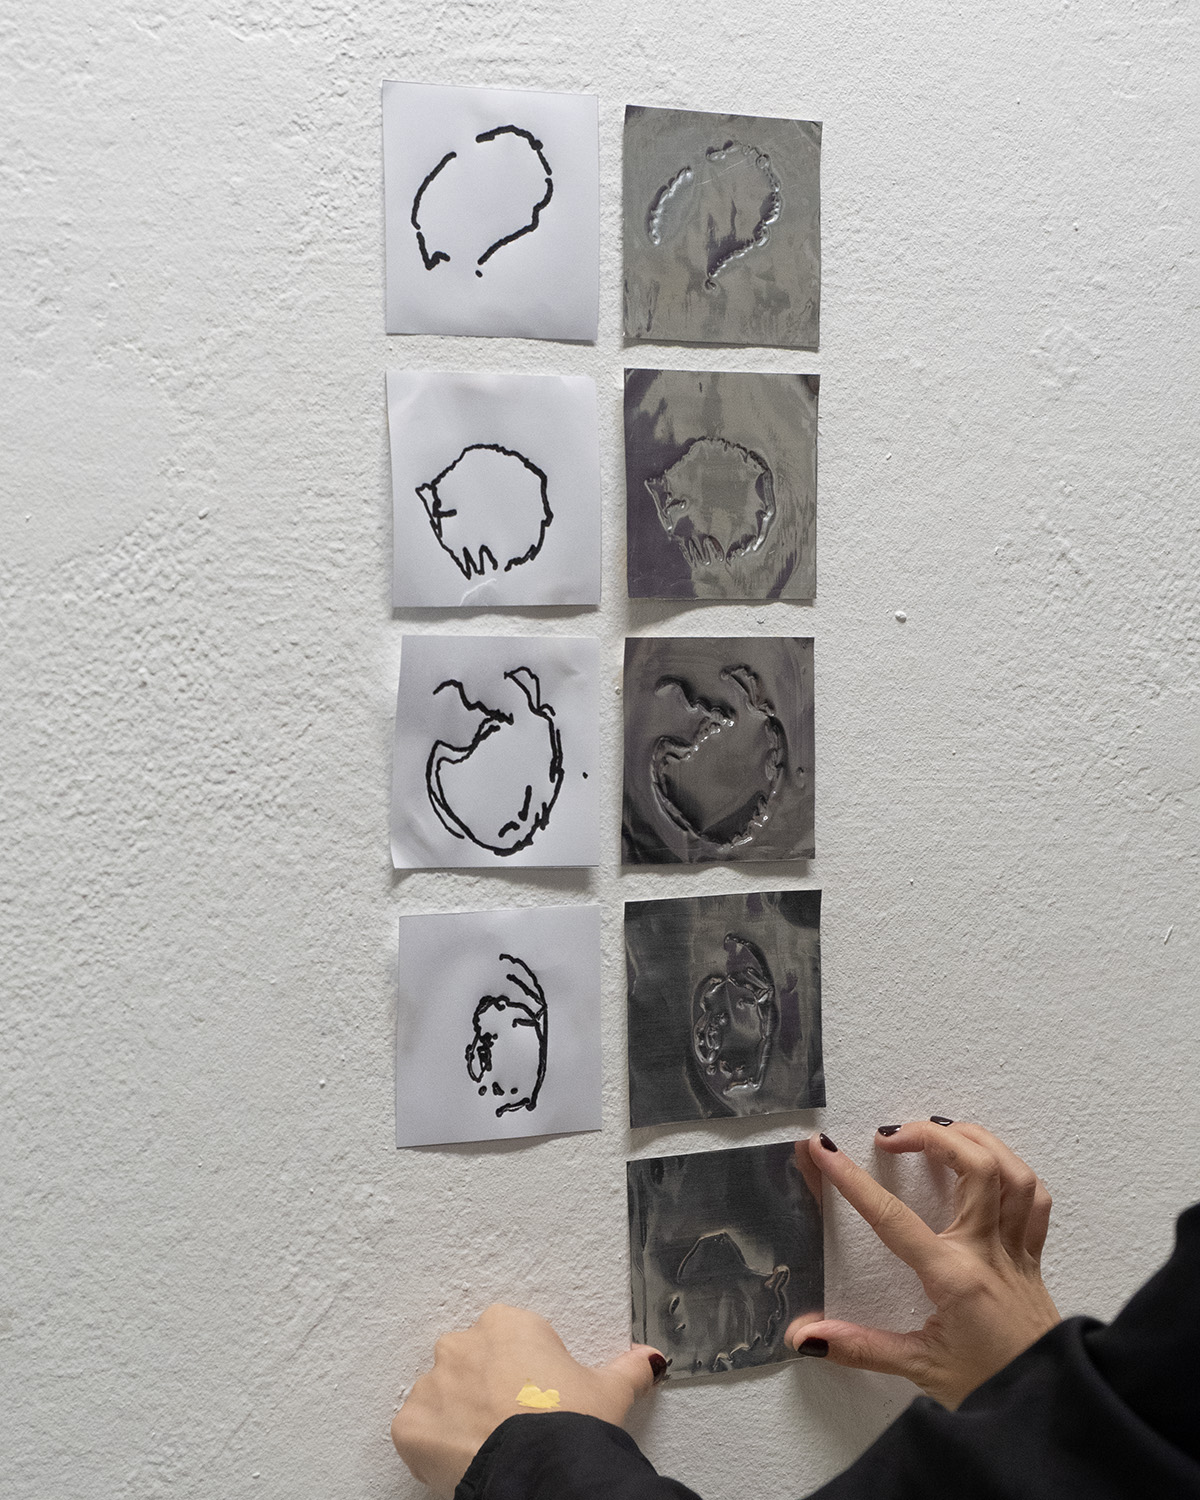
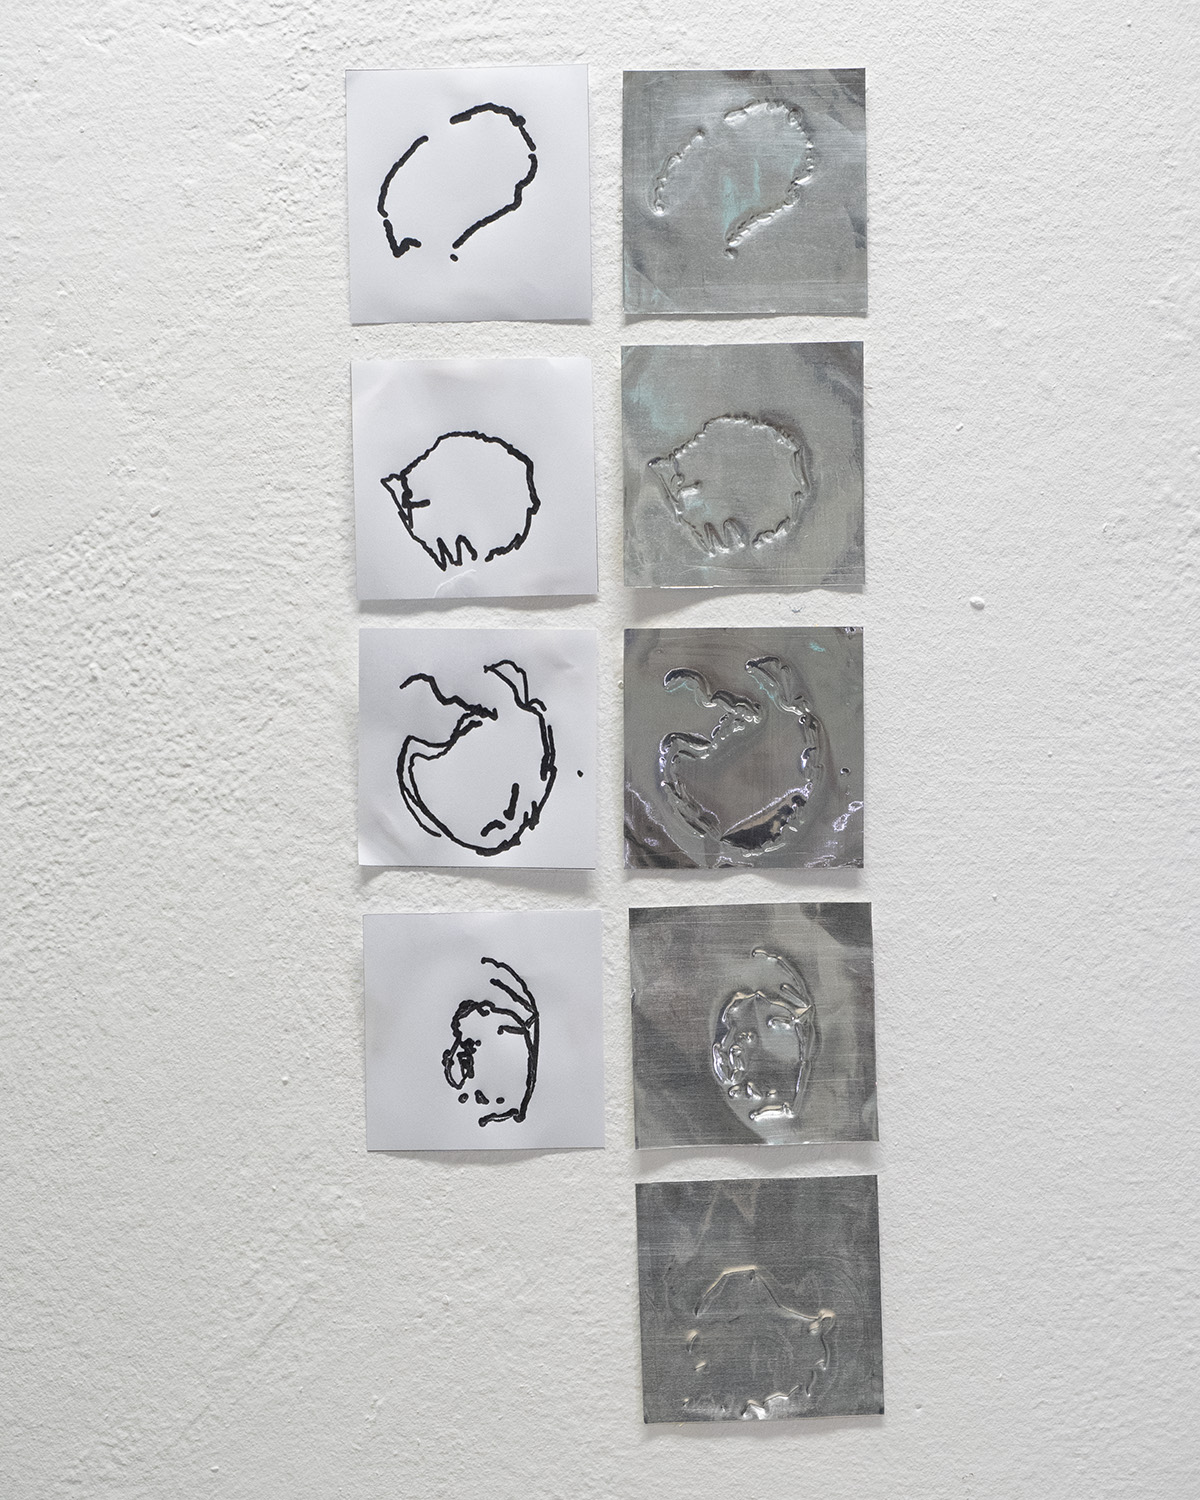
Comparing the print and foil made certain differences obvious:
- Some loops drifted outwards or bulged at certain points.
- Pressure built up at turning points, leaving deeper dents.
- Several plates showed multiple overlapping traces from repeated passes.
- Each plate became a different interpretation of the same instruction.
[ 5. Designing the comparison booklet ]
Holding the loop in the hand
A ring bound booklet for slow comparison
Simply pasting foils on the wall felt too flat. The loops needed to be handled, flipped and felt. This led me to design a ring bound comparison booklet where each spread pairs a printed loop with its embossed plate and an observation slip.
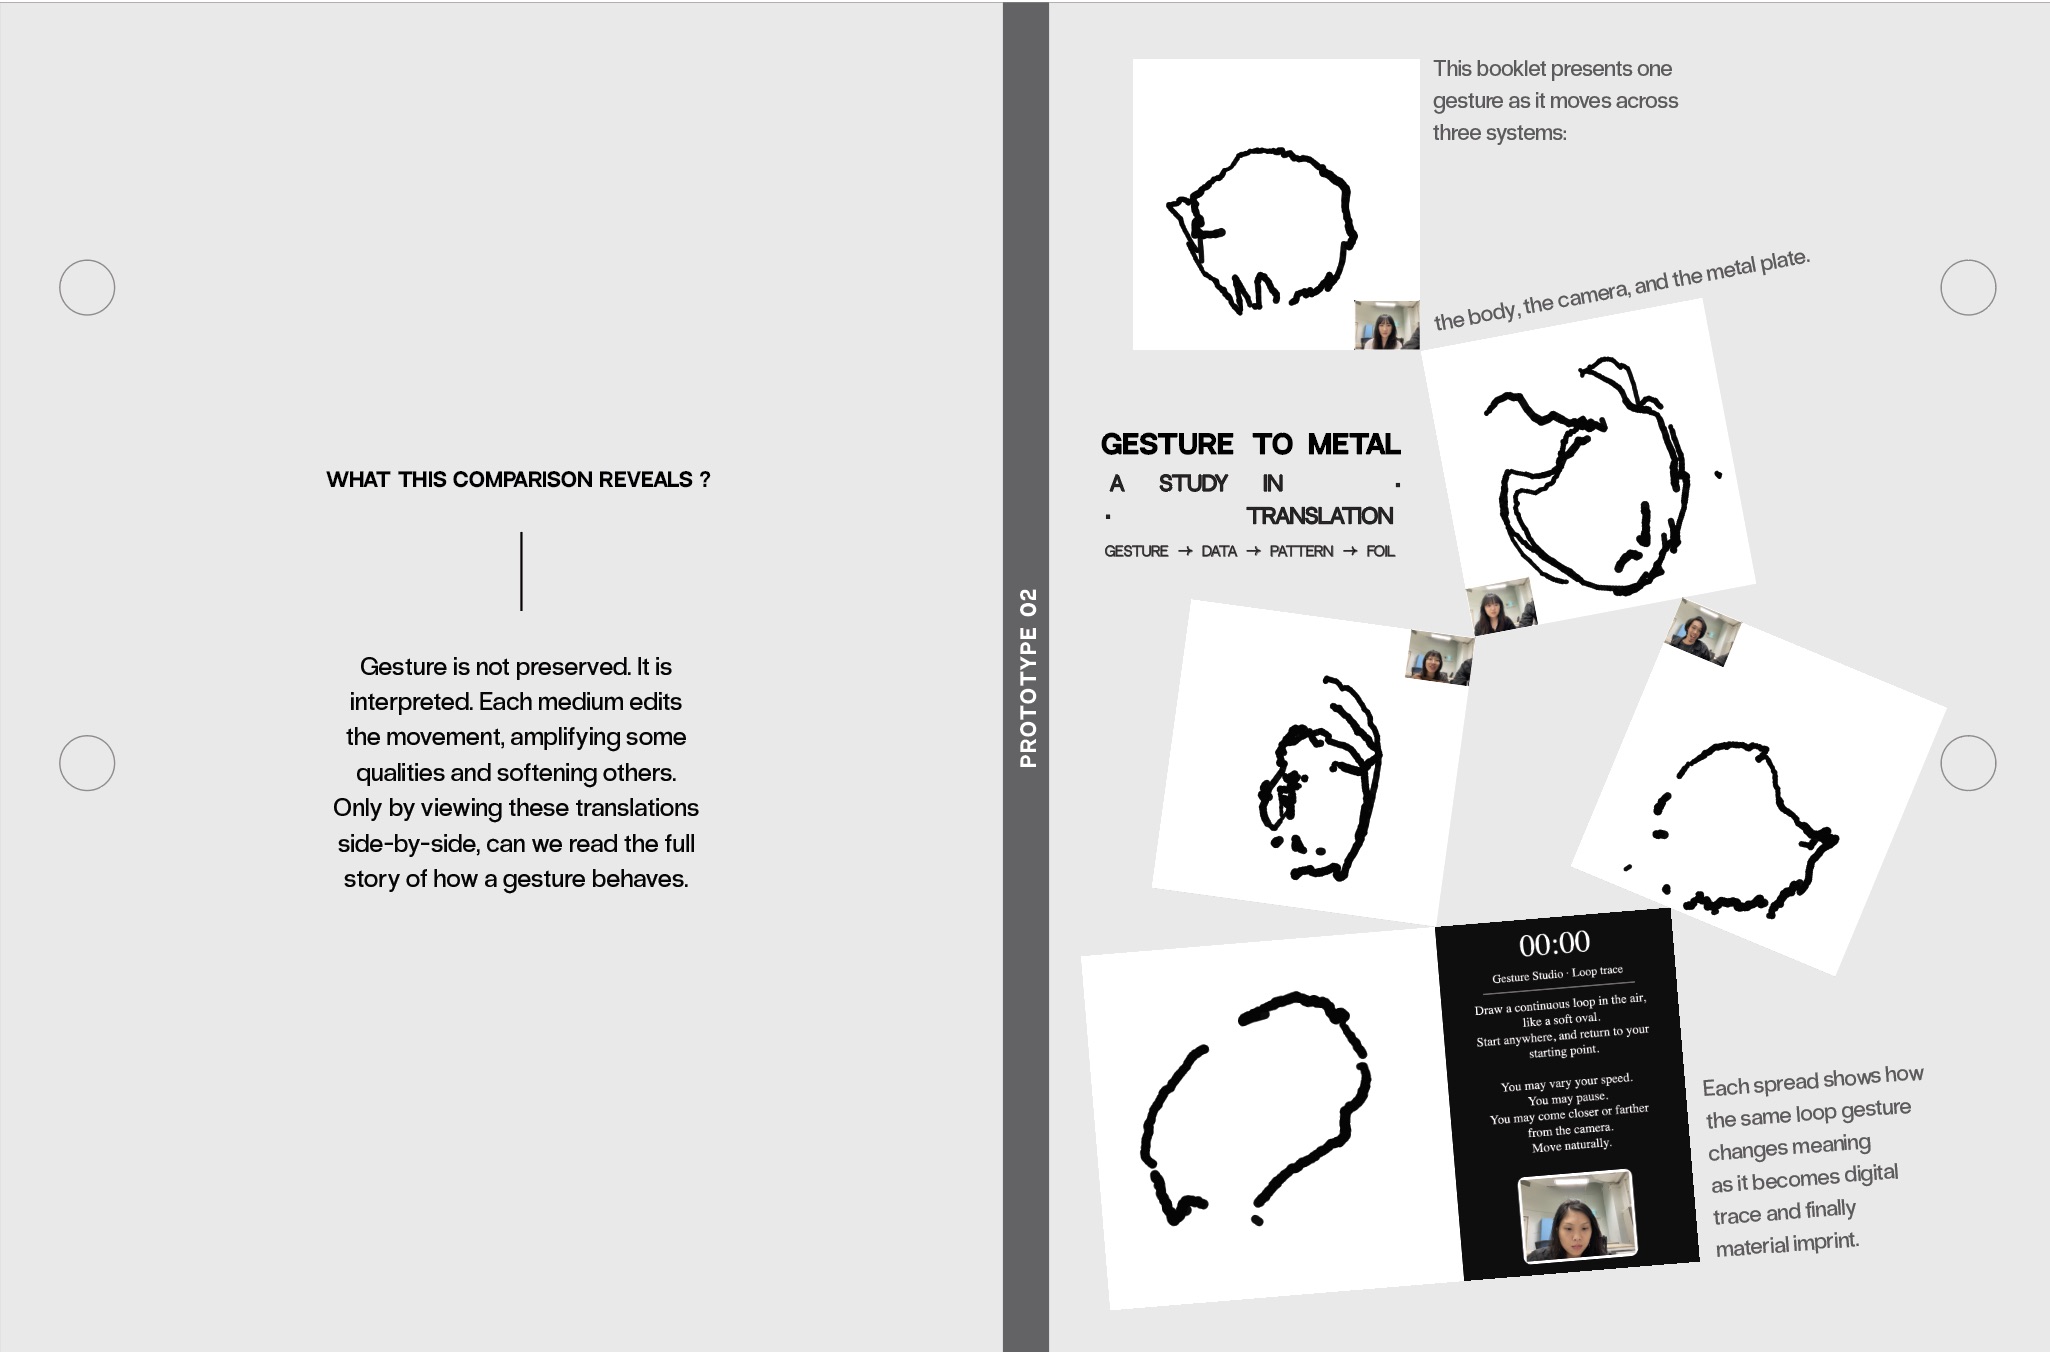
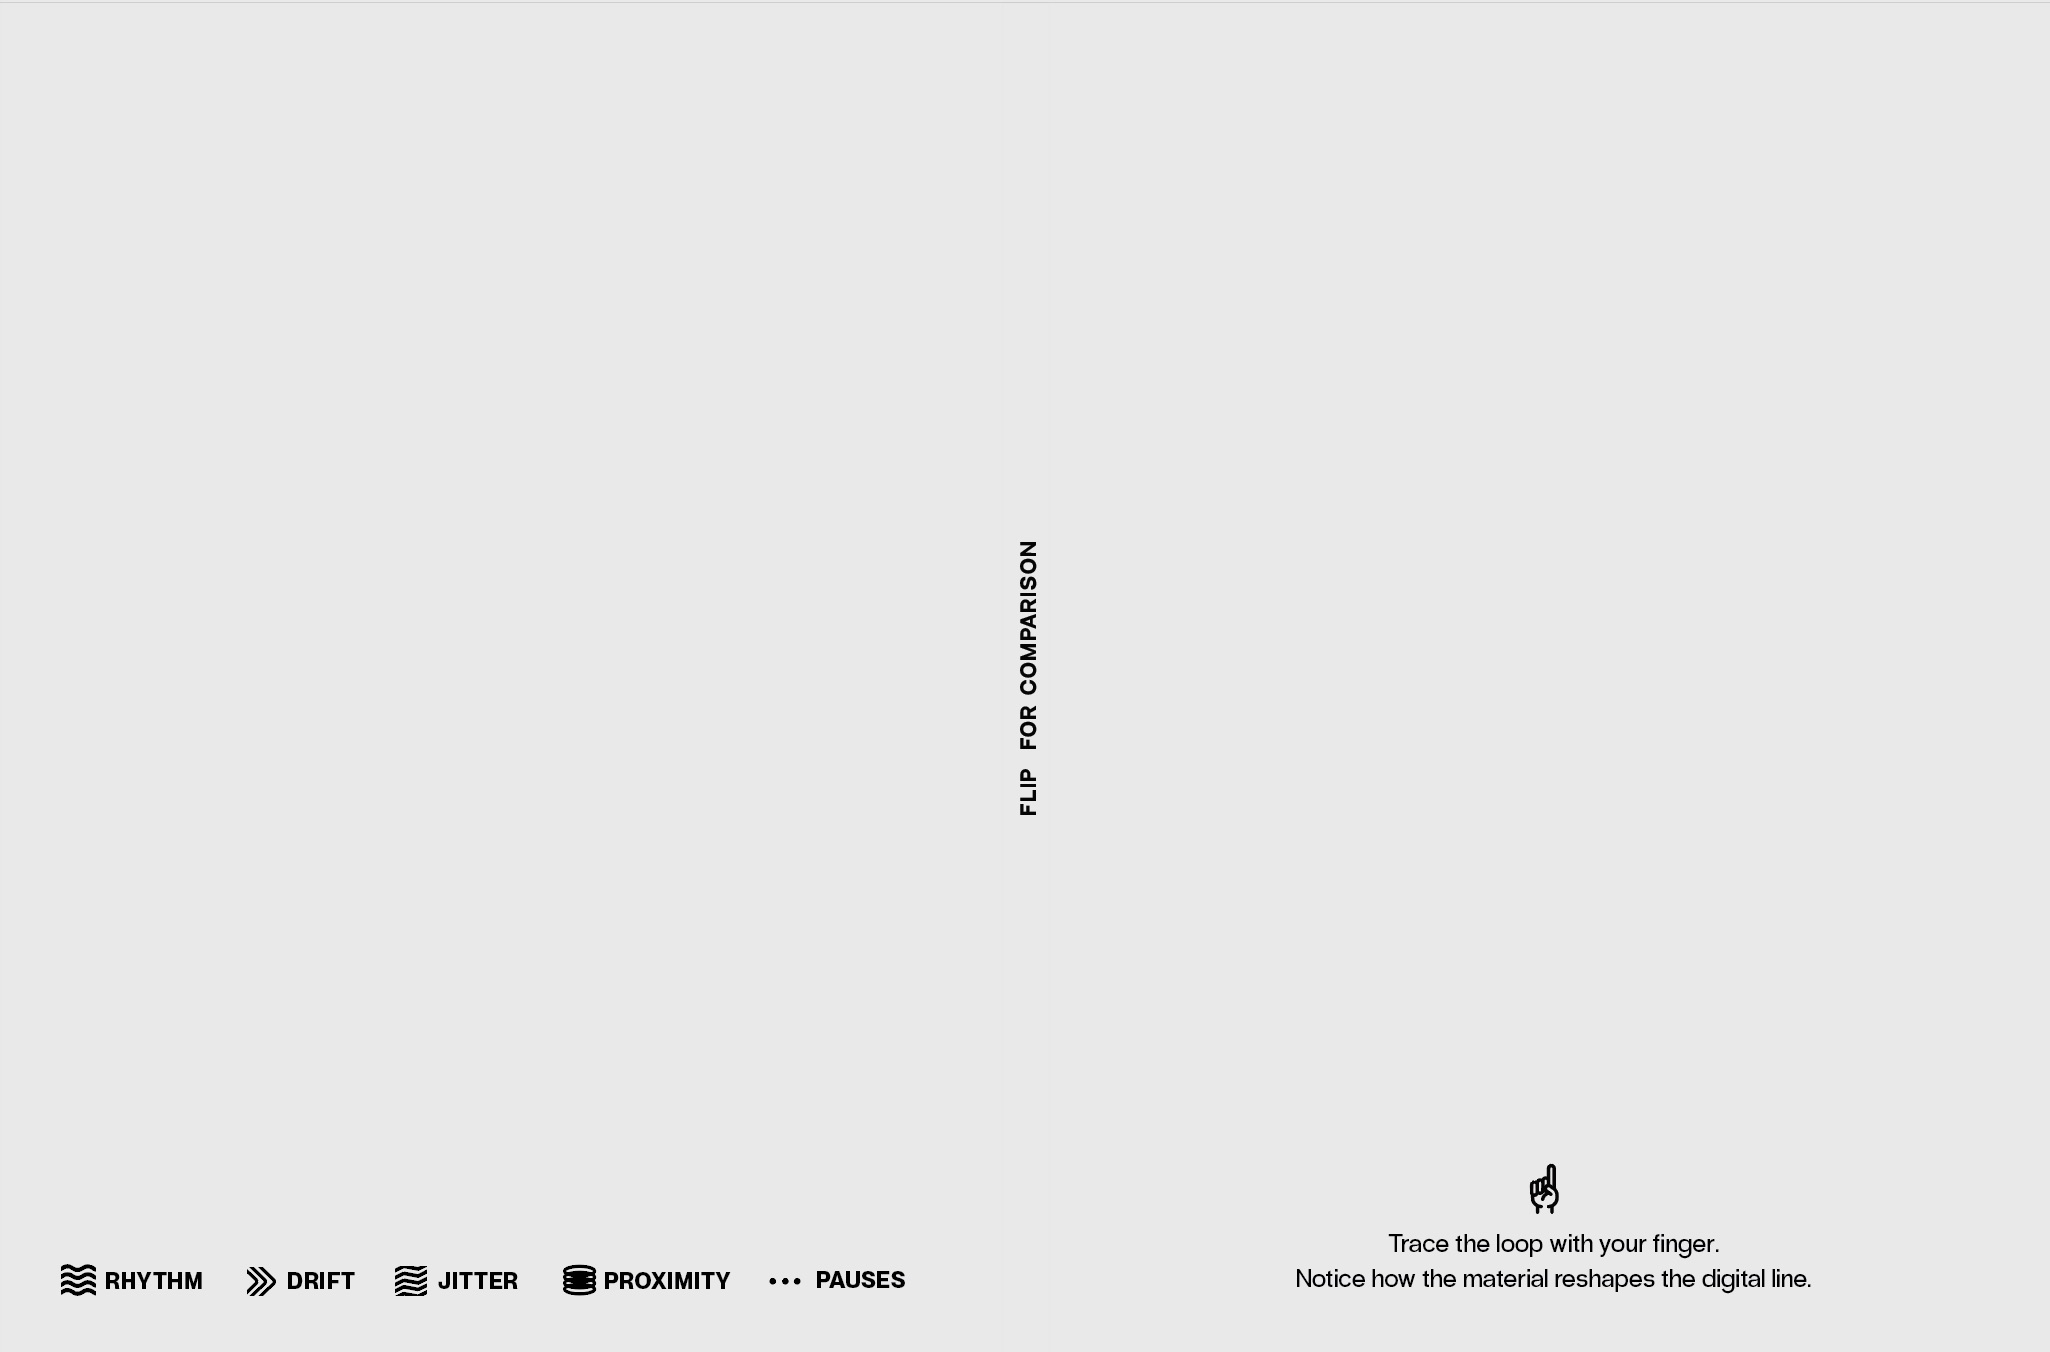
Icon based observation
Each slip uses icons to mark rhythm, drift, jitter, proximity and pauses. A legend below the slips explains each symbol so patterns can be compared quickly.
Print on the left, foil on the right
Every spread keeps the digital print on the left and the embossed foil on the right, forming a consistent reading direction from data to material.
Ring bound for touch
Hole punching and ring binding let users flip pages easily, lift the plates and feel the indents directly, instead of treating them as fragile display pieces.
The booklet turns each participant’s loop into a small artifact. It becomes a record of how movement transforms across systems, in a format that invites slow handling instead of quick scanning.
[ 6. Putting it all together ]
End to end view
From gesture to booklet in one loop
This video documents the entire workflow of Prototype 02, from aluminium preparation to gesture capture, tracing, and the finished booklet.
[ 7. What this week taught me ]
Reading translation, not chasing accuracy
Each stage remakes the gesture
This was the first time I could see the full pipeline moving in one continuous line: gesture → data → material. The interesting part was not accuracy. It was transformation. Each person’s loop became a different form at every stage.
The gesture changed through personal rhythm, pauses, drift, depth movement, tracing pressure, tool behaviour and material resistance. Each medium introduced its own interpretation. None of the outcomes were wrong. They were simply different.
This made something very clear for my research:
Gesture is not preserved. It is translated. And each translation carries its own meaning.
Right now, the most accurate way to phrase what I learned is:
Embodied movement becomes a new form at each stage, and those shifts reveal what is added, lost or emphasised by the system.
This is the core of what Prototype 02 helped me see. The project is less about protecting an “original” gesture and more about reading how systems reinterpret it as they try to understand, store and rematerialise movement.
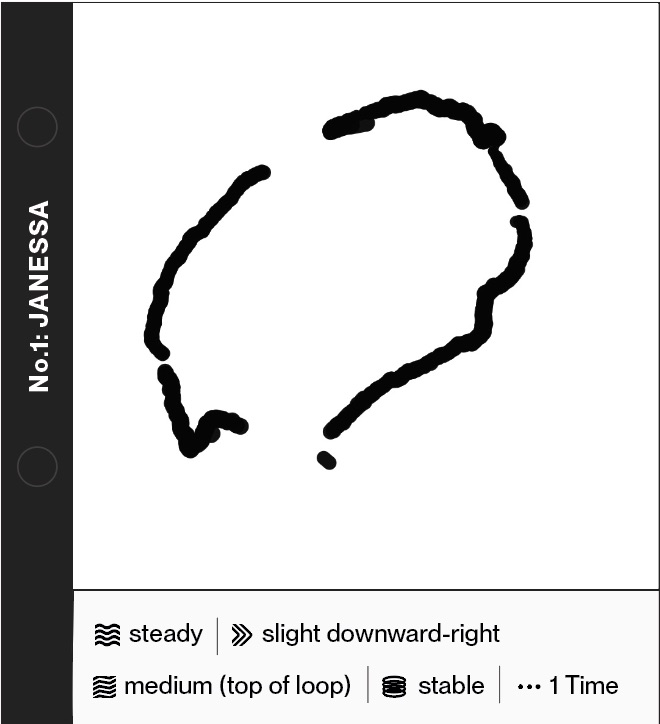
[ Gesture observation: my own loop ]
Using the observation sheet on myself
Observing my loop as data
I used the same observation sheet I designed for participants on my own Gesture Studio recording. Instead of trusting how the loop felt, I treated it as a trace to analyse: rhythm, pauses, drift, distance from the camera and jitter at different points in time.
For my loop, the sheet recorded a medium, steady rhythm with slowdowns at turning points, two visible pauses, a slight downward right drift, medium jitter where I corrected the shape and almost no change in proximity.
The summary of that digital trace can be broken into four parts:
1. Confidence with a single hesitation
The loop is mostly confident but punctuated by one clear moment of hesitation. The movement begins steadily with consistent speed and controlled curvature, then slows at the top right, creating a thicker knot in the line. That knot is the clearest sign of embodied decision making inside the digital trace.
2. Natural drift in open space
The loop drifts slightly downward right over time, suggesting that my hand relaxed into a natural arc instead of maintaining a fixed anchor. The drift is subtle but important. It shows how hard it is to keep a stable reference when drawing in mid air without a surface.
3. Jitter where I slow down to correct
Jitter concentrates in slower regions, especially where I try to correct the loop to make it more circular. Faster sections along the bottom are smoother, with fewer micro wobbles. The rhythm becomes visible in the line itself: smooth, then hesitant, then slightly corrective.
4. Stable distance from the camera
Proximity stays almost constant, which means my sense of distance from the camera was stable. The lack of thickness change suggests I focused more on horizontal and vertical movement than on depth, keeping my body anchored while the hand traced the loop.
Looking at my own gesture this way was useful. It turned a familiar movement into something slightly strange, making it easier to see how rhythm, hesitation and drift might later show up in the printed loops and foil surfaces.